HTML Tutorial
Introduction
The website which you are currently on was created from scratch using HTML and CSS. There are services which have ready-made templates for a website but I decided to start from scratch in order to brush up on my skills and learn something new along the way. I will be showing basic commands in HTML as well as some of the code I used to create this website.
Getting Started
As discussed on the website tutorial page, the index.html is usually the default homepage file for a website. An HTML file has .html as its file extension and can be created by changing the extension of a text file from .txt to .html. The text editing software I like to use is Sublime Text but your default text editor works just fine. If at any point you want to see the result of your HTML code, all you need to do is right click on the HTML file and select open with your web browser. If you like the way your page looks, you can upload it to your bucket or server depending on which process you used to create your website.
The first line of an HTML document includes a piece of code that informs the browser which version of HTML the file is written in. In this case, the tag below is for HTML 5.
<!DOCTYPE html>
The next step in creating the HTML file is to include the <html> tag which informs the browser the location of the HTML code. The rest of the HTML code is within the <html> tag. It includes the <head> tag which has the webpage metadata and the <body> tag which has the webpage core HTML code. Each tag begins with <TAGNAME> and closes off with </TAGNAME>, e.g. <html> and </html>.
Note: I am using the less than < (& l t with no spaces) and greater than > (& g t with no spaces) signs so that the HTML tags are not interpreted.
<!DOCTYPE html>

						<html>

						<head>
						</head>

						<body>
						</body>

						</html>
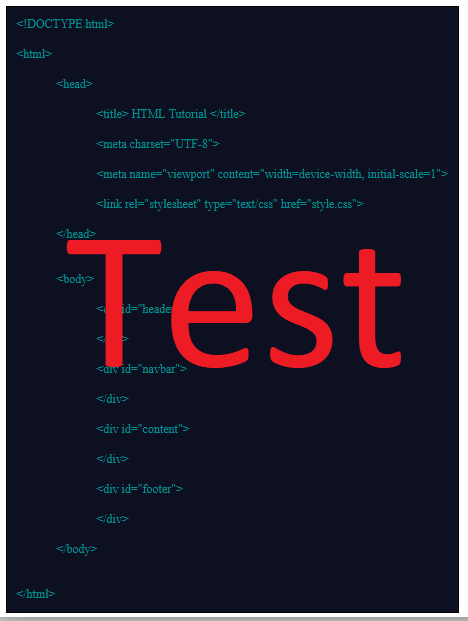
The content of the website is situated within the body tag. In the example below, I have made four division tags (containers for content) with their own unique ids (identifications) that will be used in CSS to modify each id and change the way they look and act. The header div <div id="header"> is what you see at the top of the page; the big Welcome! up at top. The navigation bar div <div id="navbar"> (abbreviated as navbar) has the different links within the website and scrolls as the website is navigated. The content id <div id="content"> contains the bulk of the website and is the content in between the navbar and the footer. The footer id <div id="footer"> contains the statement Thank you for visiting at the bottom of the page. The different division ids allow for easy customization of each section of the website using CSS. Each division can have more divisions within itself thus allowing for a greater website customization.
<!DOCTYPE html>

						<html>

						<head>
						</head>

						<body>
						<div id="header">
						</div>
						<div id="navbar">
						</div>
						<div id="content">
						</div>
						<div id="footer">
						</div>
						</body>

						</html>
Basic Commands
Here I will show you some basic commands in HTML. This section is more of an introduction on HTML rather than a full on course. My aim is to show you the basics and then you can start creating and customizing your website to your liking.
Text Modifications
Now that we have the basic format for an HTML file set, we can start discussing some basic commands in HTML. Below are some basic text modifications that can be done using HTML.
Here is the command for a header tag which was used for the Welcome! at the top of the page and the title of the page HTML Tutorial
HTML Code: <h1> This is h1 </h1>
Output:
This is h1
Here is the command for a header tag which was used for each section of the page such as Basic Commands
HTML Code: <h2> This is h2. </h2>
Output:
This is h2.
Here is the command for a header tag which was used for each subsection of the page such as Text Modifications
HTML Code: <h3> This is h3. </h3>
Output:
This is h3.
Here is the command for a bold tag which was used in the in the HTML Code: and Output: text.
HTML Code: <b> This text is bold. </b>
Output:
This text is bold.
Here is the command for an italicized tag.
HTML Code: <i> This text is italicized. </i>
Output:
This text is italicized.
Here is the command for a centered tag.
HTML Code: <center> This text is centered </center>
Output:
Here is the command to change the font color and size.
HTML Code: <font color="#ff0000" size="24"> This changes the text color to red using hexadecimal color values and changes the font size to 24px. </font>
Output:
This changes the text color to red using hexadecimal color values and changes the font size to 24px.
You can also combine different tags by embedding them within one another but this is a bit messy and it is better to use CSS.
HTML Code:<b> <i> <center> <font color="#ff0000" size="24"> Using multiple tags. </font> </center> </i> </b>
Output:
Links and Images
This section will discuss how to link to websites, including your own website, and display images.
The hyperlink tag <a> allows one to create a link to a website. I created a hyperlink to the Adobe Color Wheel website which I found to be very useful when choosing different colors. The URL of the link goes in between the quotes after href=. The target="_blank" is optional but it allows the link to open up in a new browser tab rather than replacing the tab you are currently on. The Adobe Color Wheel statement can be replaced with whatever text you want as it is the text that shows up in the hyperlink tag.
HTML Code: <a href="https://color.adobe.com/create/color-wheel/" target="_blank">Adobe Color Wheel </a>
Output:
Adobe Color Wheel
You can also link to pages within your own website just make sure the directory path is selected correctly. For example, my index.html file is in the same directory as my htmltutorial.html file so I can link it directly. However, if they were not in the same directory I would have to like it through the specific directories. In the Test hyperlink below, a test.html file is located within the directory Test which is in the same directory as index.html and htmltutorial.html. You can also jump up a directory (../htmltutorial.html) to link to a file above the current directory or go to root directory (/htmltutorial.html) directly as it can be tedious to keep jumping up directories (../../../). Click on the test link to see the extra links.
Note: The root directory method won't work if you are using your browser to preview your page as it takes you to the root of your current drive. You will need to upload your html files to the server in order for it to work.
   <a href="index.html" target="_blank">Home </a>
							<a href="Test/test.html" target="_blank">Test </a>
							<a href="../htmltutorial.html" target="_blank">HTML Jump </a>
							<a href="/htmltutorial.html" target="_blank">HTML Root </a>
Output:
Home
Test
You can link to a specific tag of a page using the id property. The first link takes you to the header div <div id="header"> on this page while the second link takes you to the h1 tag in the Text Modifications section. This can be done by adding the id property to any tag. For example, I gave the h1 tag in the Text Modifications section the id of this by including it in the h1 tag as follows: <h1 id="this"> This is h1 </h1>. The third link takes you to the Creating your Server Using EC2 Instances section on the Getting Started Using Amazon Web Services page.
HTML Code: <a href="#header">Header Section </a>
<a href="#this">Linking to the h1 tag in the Text Modifications section. </a>
<a href="websitesetup.html#server" target="_blank">Creating your Server Using EC2 Instances section on the Getting Started Using Amazon Web Services page. </a>
Output:
Header Section
Linking to the h1 tag in the Text Modifications section.
Creating your Server Using EC2 Instances section on the Getting Started Using Amazon Web Services page.
The code below allows you to display an image on your webpage. The image location or URL is placed in the quotes right after src=. Here I have used a test image I created titled test.png located in the directory images\htmltutorial\. The second image is linking to the Google logo. The alt tag allows you to have some text in place of the image in case the website isn't loading or the image has been misplaced.
You can also include the style property (you can include it in any HTML tag) which uses CSS to modify that specific tag. Here we are using it to adjust the size of the image by stating style="max-width: 50%;" which makes the maximum width of the image 50% of its original value. Setting a maximum width allows the image to resize with the window. You can also set the width by stating an exact number of pixels. The Google image has a width of 500px and starts to become distorted as it is past its original size. It also does no resize with the window as we used width and not max-width.
An image can also be hyperlink by embedding it within a hyperlink tag.
HTML Code: <img src="images\htmltutorial\test.png" alt="Test Image" style="width: 20%;">
<img src="https://www.google.com/images/branding/googlelogo/1x/googlelogo_color_272x92dp.png" alt="Test Image" style="width: 720px;">
<a href="index.html" target="_blank"> <img src="images\osd.JPG" alt="Hyperlink Image" style="width: 20%;"> </a>
Output:


Other
This section will discuss other tags and stylizations that can be done in HTML.
Below is the code to create an unordered list <ul> and an ordered list <ol>. The unordered list has bullet points as the default style while the ordered list has numbers as the default style. Each list then has within itself the list item tag <li> which has the content of each item in the list. You can embed a link within each list item if you would like as well.
HTML Code: <ul>
<li> This is an unordered list</li>
<li> Which has bullet points as the default style</li>
<li> With different list items</li>
<li> One more item</li>
</ul>
<ol>
<li> This is an ordered list</li>
<li> Which has bullet points as the default style</li>
<li> With different list items</li>
<li> <a href="index.html" target="_blank"> Home </a> </li>
</ol>
Output:
- This is an unordered list
- Which has bullet points as the default style
- With different list items
- One more item
- This is an ordered list
- Which has numbers as the default style
- With different list items
- Home
The break tag <br> causes items to start on a new line which is useful when formatting the structure of text or images of a website.
HTML Code: <br> This is a line break which causes text to start on a new line but it does not create spacing between new lines
<br> Another line break which can be seen to not have any spaces between each line and only starts a new line. It is important to note that I have been using & l t br & g t between each set of tags in order to create spacing. For example, the images below now do not have the break tag in between them.
<img src="images\htmltutorial\test.png" alt="Test Image" style="width: 20%;">
<img src="https://www.google.com/images/branding/googlelogo/1x/googlelogo_color_272x92dp.png" alt="Test Image" style="max-width: 20%;">
Output:
This is a line break which causes text to start on a new line but it does not create spacing between new lines.
Another line break which can be seen to not have any spaces between each line and only starts a new line. It is important to note that I have been using <br> between each set of tags in order to create spacing. For example, the images below now do not have the break tag in between them.
The paragraph tag <p> is used to store the text of your webpage. I have been writing all the text of this webpage using the paragraph tag as it creates spacing unlike the break tag.
HTML Code: <p> This is a paragraph which creates spacing above and below unlike the break tag. </p>
<p> This is a second paragraph. </p>
Output:
This is a paragraph which creates spacing above and below unlike the break tag.
This is a second paragraph.
As discussed in the image section, the style property can be added to any tag and can be used to stylize tags in many ways. Below is an example of combining different styles and different tags. This can be done in a much cleaner manner using CSS.
- background-color:#ff0000; Changes the background color to #ff0000.
- color:#ffffff; Changes the font color to #ffffff.
- font-family:Comic Sans MS; Changes the font family to Comic Sans MS.
- font-size: 26px; Changes the font size to 26px.
- text-align:center; Aligns text to center.
<p style="background-color:#ff0000; color:#ffffff; font-family:Comic Sans MS; font-size: 26px; text-align:center;"> You can also combine different styles to create different effects using the style property. Click <a href="index.html" target="_blank" style="background-color:#A68F28; color:#965BB0; font-family:Courier New; font-size: 72px; text-align:center;">here to go to the homepage. </p>
Output:
You can also combine different styles to create different effects using the style property. Click here to go to the homepage.
Basic Setup For This Website
This section will show the overall structure of the HTML file I used to create this website. As seen in the Getting Started section, the core code of the HTML file is inside the html tag <html>. Each tag usually has an id or a class which allows it to be customized using CSS. An id (#idname) is unique as it can be used to link to a specific part of the website such as the #header. A class (.classname) can be applied to multiple tags and is not unique. Both can be customized with the same attributes as CSS sees no difference between them from a styling perspective.
Head
The head tag <head> contains the metadata of the webpage. The title tag <title> is the title of the page such as HTML Tutorial which can be seen in the browser tab. The meta tag <meta> can contain different types of metadata. I am using charset, name, and content. The charset attribute defines what kind of character set will be used for the page as explained on w3schools.com; UTF-8 encompasses almost all available characters. The viewport attribute allows the page to be adjusted for different screen sizes; again more information can be seen on w3schools.com. The link tag <link> allows the user to link a CSS file in order for the browser to know how the tags are stylized for the HTML file; more information can be found at w3schools.com.
The head tag <head> also contains some links to the Favicon which is the icon that you see on the tab of your browser. The Favicon was created using Real Favicon Generator. The Google Analytics script is also included in the head tag <head> as discussed in Installing Google Analytics.
HTML Code:<head>
<title> HTML Tutorial </title>
<meta charset="UTF-8">
<meta name="viewport" content="width=device-width, initial-scale=1">
<link rel="stylesheet" type="text/css" href="style.css">
<link rel="apple-touch-icon" sizes="180x180" href="images/favicons/apple-touch-icon.png">
<link rel="icon" type="image/png" sizes="32x32" href="images/favicons/favicon-32x32.png">
<link rel="icon" type="image/png" sizes="16x16" href="images/favicons/favicon-16x16.png">
<link rel="manifest" href="images/favicons/manifest.json">
<link rel="mask-icon" href="images/favicons/safari-pinned-tab.svg" color="#5bbad5">
<meta name="theme-color" content="#ffffff">
<script async src="https://www.googletagmanager.com/gtag/js?id=XXXXXXXXXX"></script>
<script>
window.dataLayer = window.dataLayer || [];
function gtag(){dataLayer.push(arguments);}
gtag('js', new Date());
gtag('config', 'XXXXXXXXXX');
</script>
</head>
Body - Header
The body tag <body> contains the bulk of the HTML code for the website. This first div id I created in the body tag <body> was the header. This is the big Welcome! up at top. I am using the text-align property to align the h1 tag in the center but all the color is done using the CSS file. More information can be found on the CSS page.
HTML Code:<div id="header">
<h1 style="text-align:center;">Welcome!</h1>
</div>
Body - Navigation Bar
This next div id I created in the body tag <body> was the navigation bar or navbar for short. There are two main classes of divs for the navigation bar: homebutton and dropdown. The homebutton class is for the Home button and the dropdown class is for the dropdown buttons such as Website Tutorial, Arduino Projects, Coding, and Other. The other classes within the dropdown div contain the stylization of the page buttons within the dropdown menus. Detailed information about each class and the scrolling of the navigation bar can be found on the CSS page.
<div id="navbar">

							<div class="homebutton">
							<a href="index.html">Home</a>
							</div>
							<div class="dropdown">
							<button class="dropbtn">Website Tutorial</button>
							<div class="dropdown-content">
							<a href="websitesetup.html">Getting Started Using Amazon Web Services</a>
							<a href="htmltutorial.html">HTML</a>
							<a href="csstutorial.html">CSS</a>
							</div>
							</div>
							<div class="dropdown">
							<button class="dropbtn">Arduino Projects</button>
							Add the remaining links in the dropdown menu here
							</div>
							</div>
Body - Content
The content div contains the bulk of the webpage content. Here I title each section using the h2 tag <h2> and each subsection with the h3 tag <h3>. The divs with the section class contain the tutorial text, code, and images of the webpage. The stylization for these classes can be found on the CSS page.
HTML Code:<div id="content">
<h2 class="h2section">Introduction</h2>
<div class="section">
Introduction Stuff
</div>
<h2 class="h2section">Basic Commands</h2>
<div class="section">
<h3 class="h3section">Text Modifications</h3>
<div class="section">
Text Modification Stuff
</div>
<h3 class="h3section">Links and Images</h3>
<div class="section">
Links and Images Stuff
</div>
<h3 class="h3section">Other</h3>
<div class="section">
Other Stuff
</div>
</div>
<h2 class="h2section">Basic Setup For This Website</h2>
<div class="section">
Basic Setup For This Website Stuff
</div>
</div>
Body - Footer
The footer div id is at the very bottom of the webpage and was stylized using the CSS file. It also uses a push feature which pushes the footer to the bottom of the browser even if there is not enough content on the page. Again, more information can be found on the CSS page.
HTML Code:<div id="footer">
Thank you for visiting.
</div>