Getting Started Using Amazon Web Services
- Using Amazon Web Services: Storage - S3
- Using Amazon Web Services: EC2 Instance
- Registering a Domain
- Installing Google Analytics
Using Amazon Web Services: Storage - S3
In this tutorial, I will show you how to set up your very own simple website like the one you are currently on. This tutorial will be based on the AWS Tutorial for making a static website. My aim is to provide a short and concise tutorial with images that will guide the user. The first step is to make an Amazon Web Services (AWS) account by going to their website at https://aws.amazon.com. After your account has been created, select AWS Management Console under the My Account drop down menu in the top right corner of the browser. Now select the Services menu and click on the S3 link under Storage in order to begin setting up your static website.
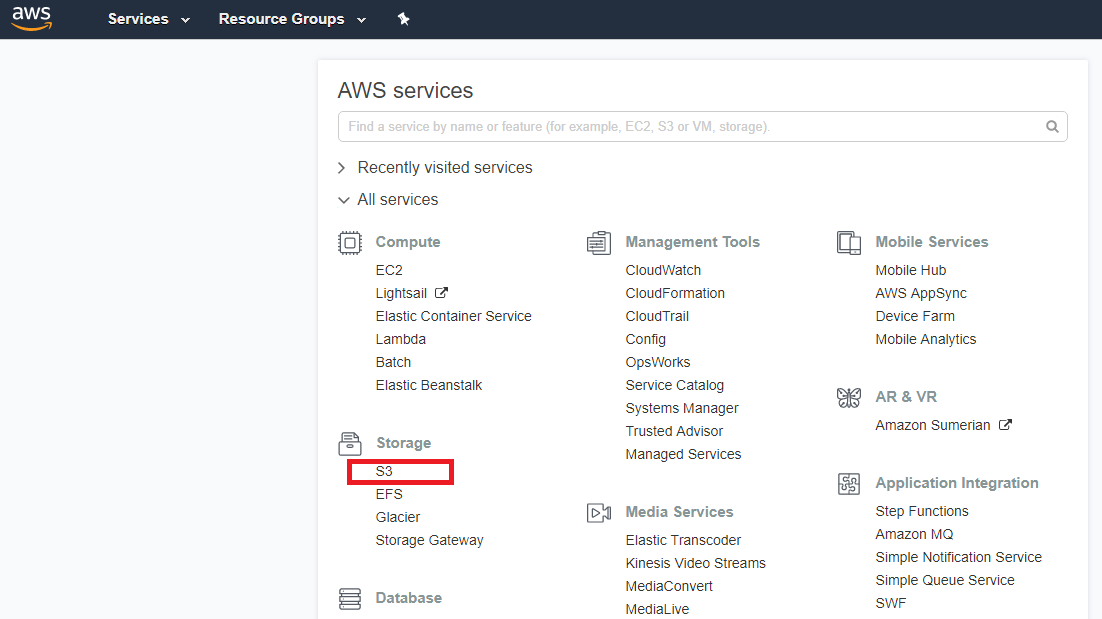
AWS Menu
You will now be directed to the Amazon S3 menu and be able to select the Create bucket option as seen below.
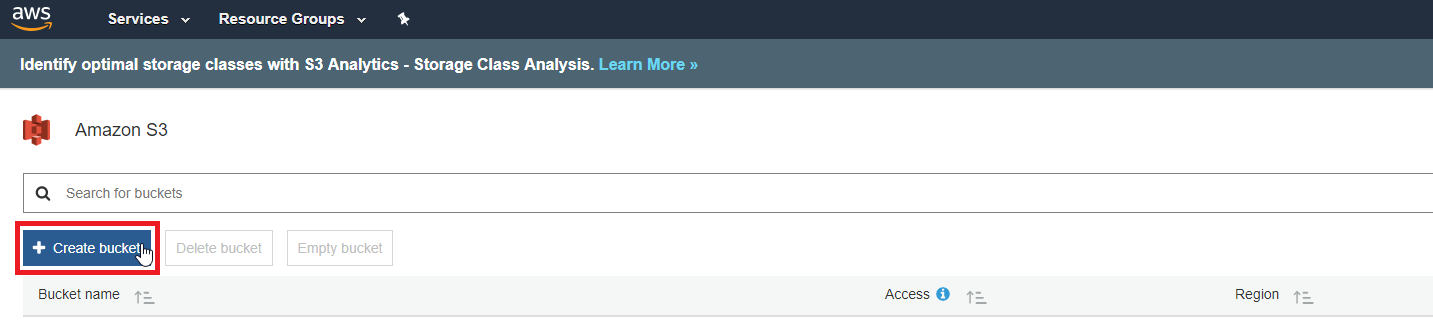
Create Bucket
The first step is to select your bucket name. For this tutorial, I named my bucket examplebucket-01.
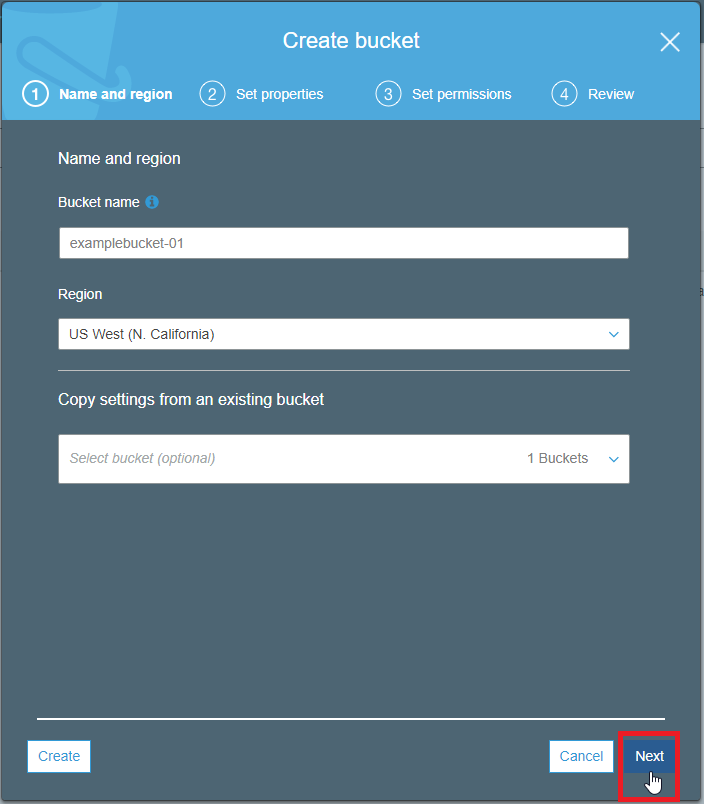
Name and Region
The Set Properties menu will be the next window that shows up, no need to change anything on this page.
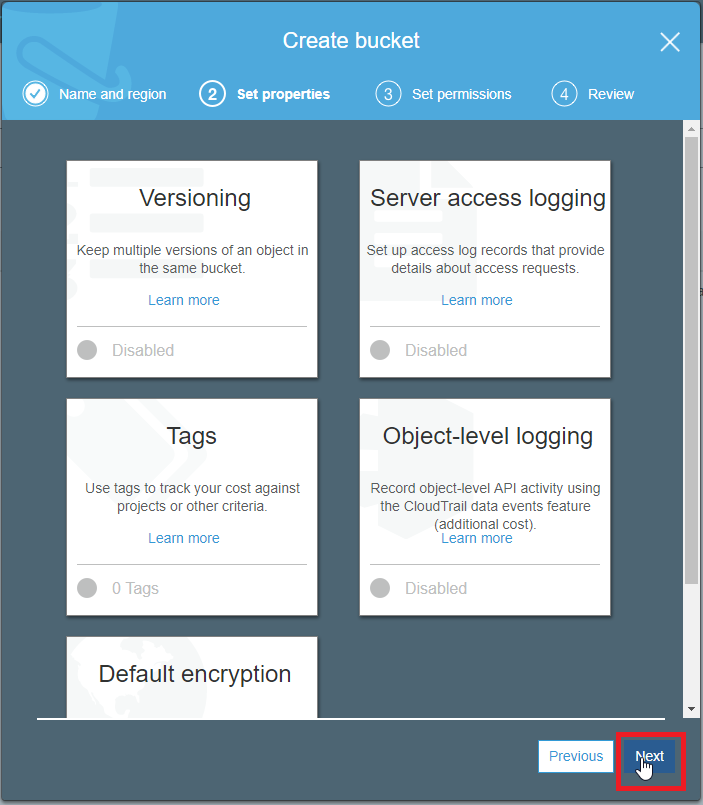
Set Properties
The Set Permissions menu will be shown next, no need to change anything on this page as well.
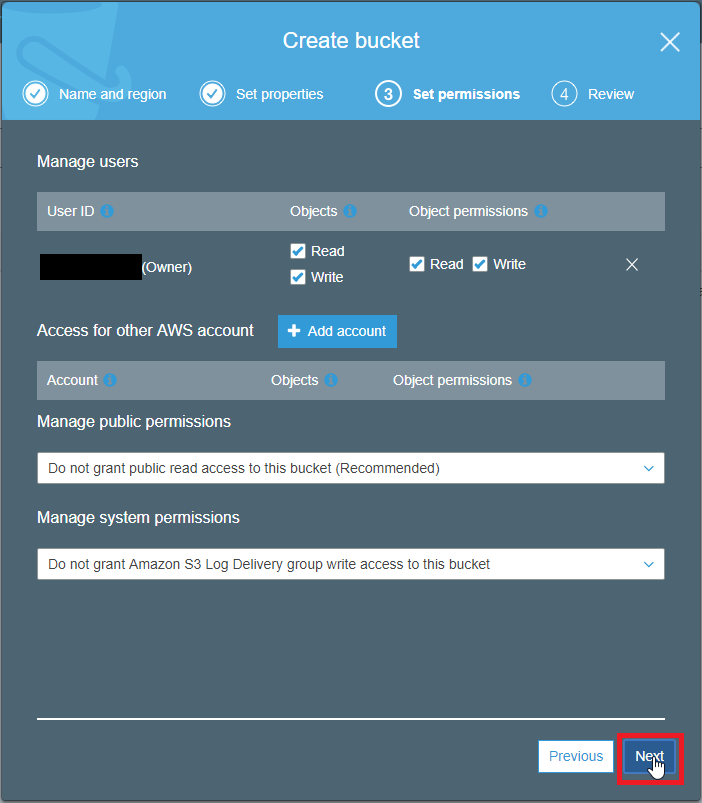
Set Permissions
The final menu is the Review menu. Select Create bucket to create your bucket.
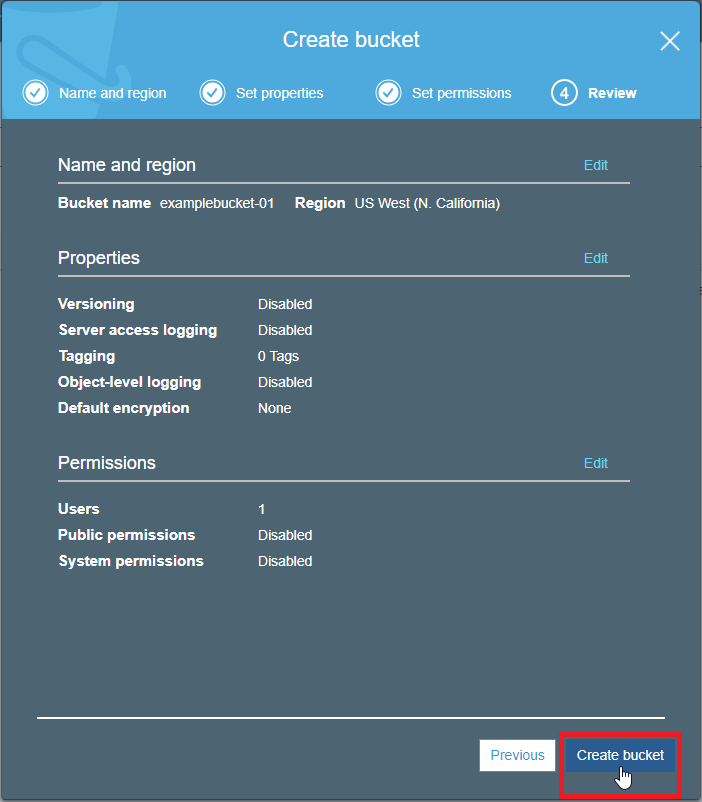
Review
Now we must make the bucket we just created visible in order for it be viewable as a web page. Select the bucket that was just created and go to the Properties tab. Now select the Static website hosting option and choose the Use this bucket to host a website option. The index and error document filenames can be left as the default filenames as indicated in the input boxes.
Note: The address stated as Endpoint will be your website URL.
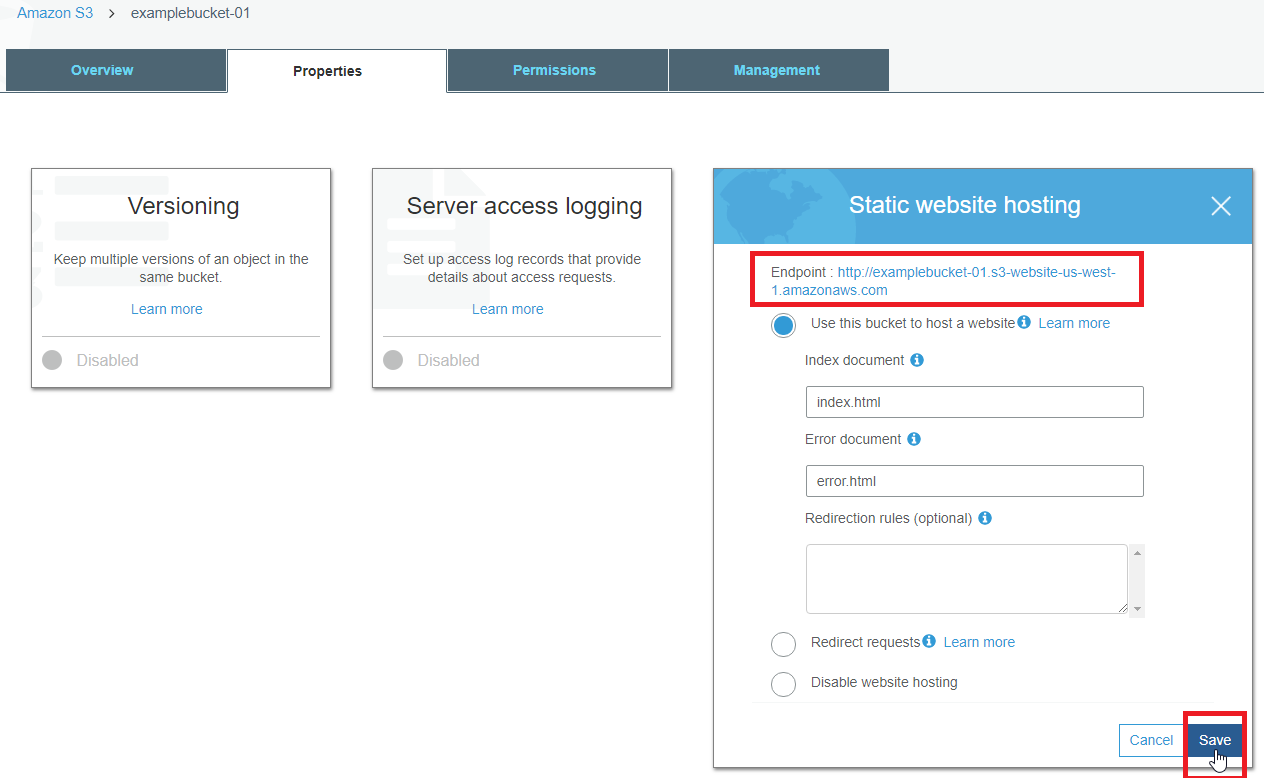
Static Website Hosting
Under the Permissions tab select Bucket Policy and paste the code below in order for this bucket to be viewable as a website. Be sure to change the bold red text to your bucket name. A warning will show stating that the bucket is now public but this is fine as it can now be viewed as a webpage. The code was taken from the AWS Tutorial and more detailed information about setting up the static website can be found there as well.
{
						   "Version":"2012-10-17",
						   "Statement":[{
						 	"Sid":"PublicReadForGetBucketObjects",
						         "Effect":"Allow",
						 	  "Principal": "*",
						       "Action":["s3:GetObject"],
						       "Resource":["arn:aws:s3:::examplebucket-01/*"
						       ]
						     }
						   ]
						 }
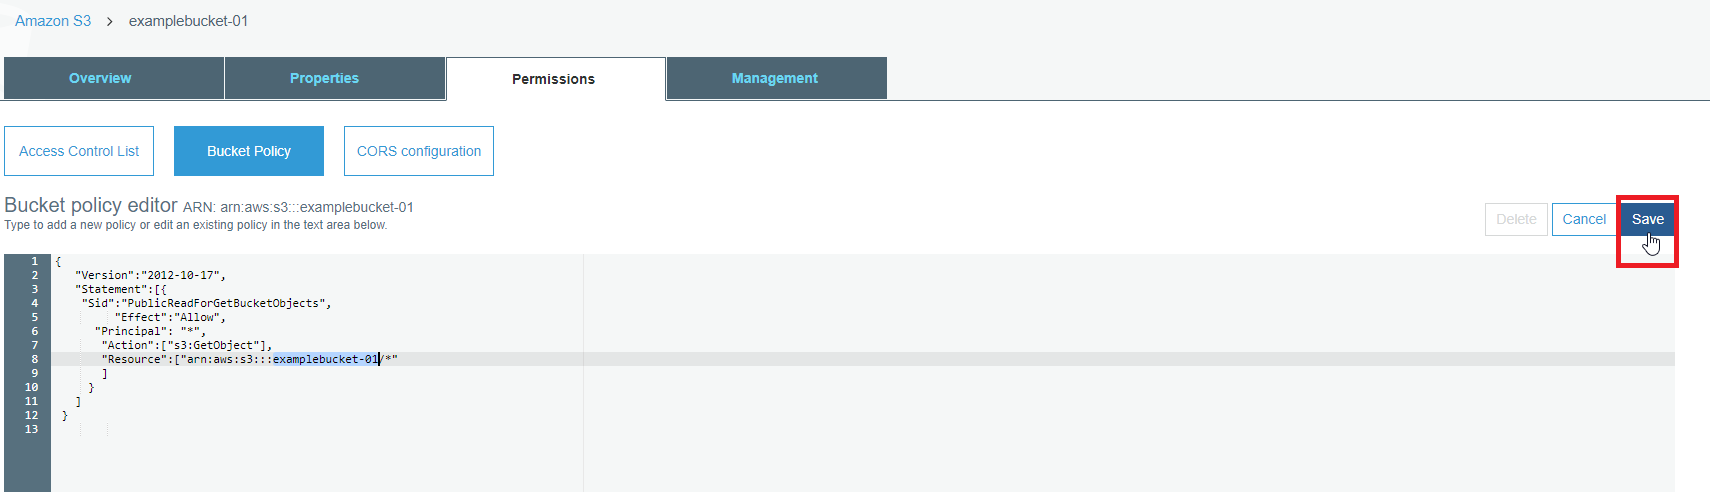
Bucket Policy
Now we must create the index.html file which will be the home page for your website. Create a new text file and paste the code below. Name the file index and change the extension of the file from .txt to .html. This will be the test index.html file.
<h1>It Works!</h1>
In the Overview tab, select upload and upload your index.html file.
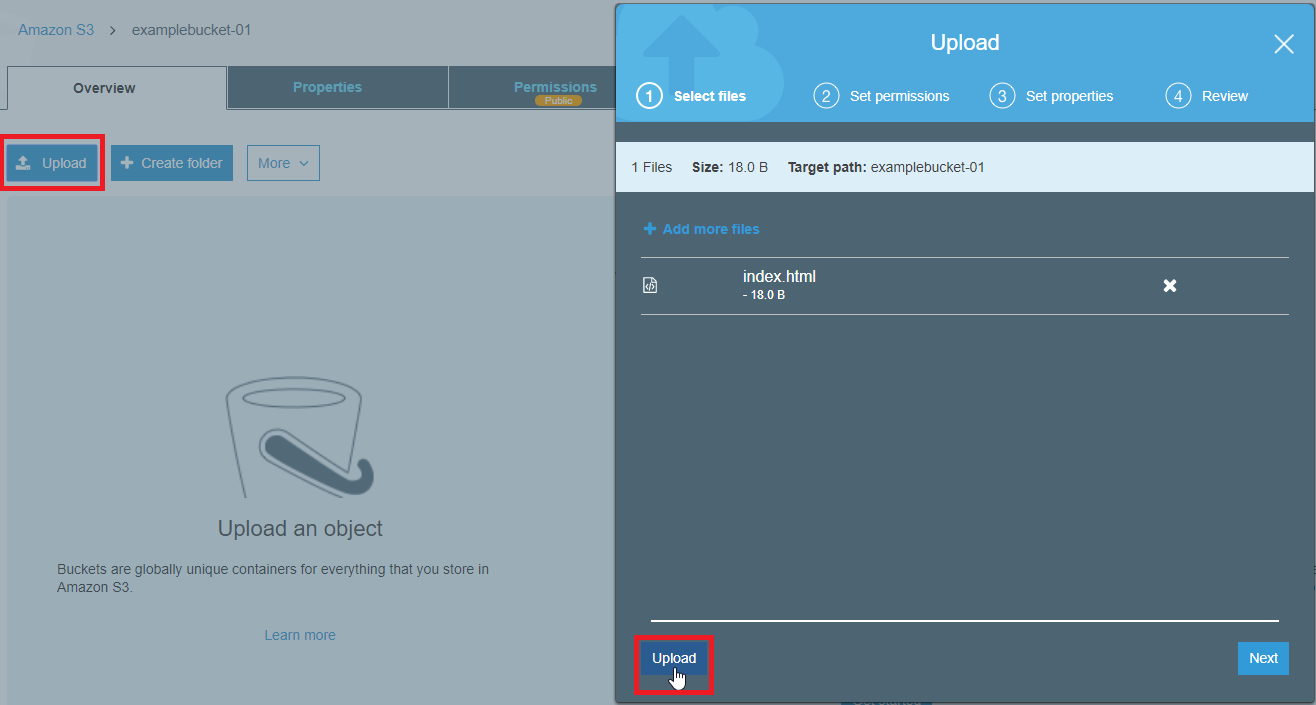
Upload index.html
Now go to your designated URL titled Endpoint that was seen in the Static website hosting step and you should have your homepage working now!
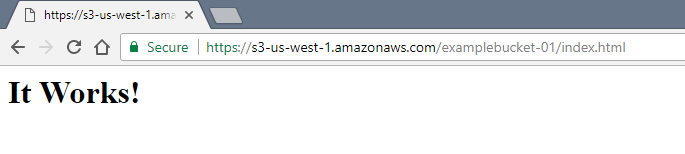
It Works!
Yes, the homepage does not look very exciting right now but this is the blank slate that you will use to create your website. This website was created from scratch using HTML and CSS all starting with a blank text document. Please see the HTML and CSS tutorial pages for more information on how this webpage was created and on how you can create your own.
Using Amazon Web Services: EC2 Instance
Another way of hosting your own website through Amazon Website Services is using their EC2 instances. This method is a bit more involved but it is a great learning opportunity if you want to interact with a Linux server. Below is a list of sections available for this tutorial.
Creating your Server Using EC2 Instances
The first step in creating your website is to create an EC2 Instance. Select the Services menu and click on the EC2 link under Compute in order to begin setting up your website server.
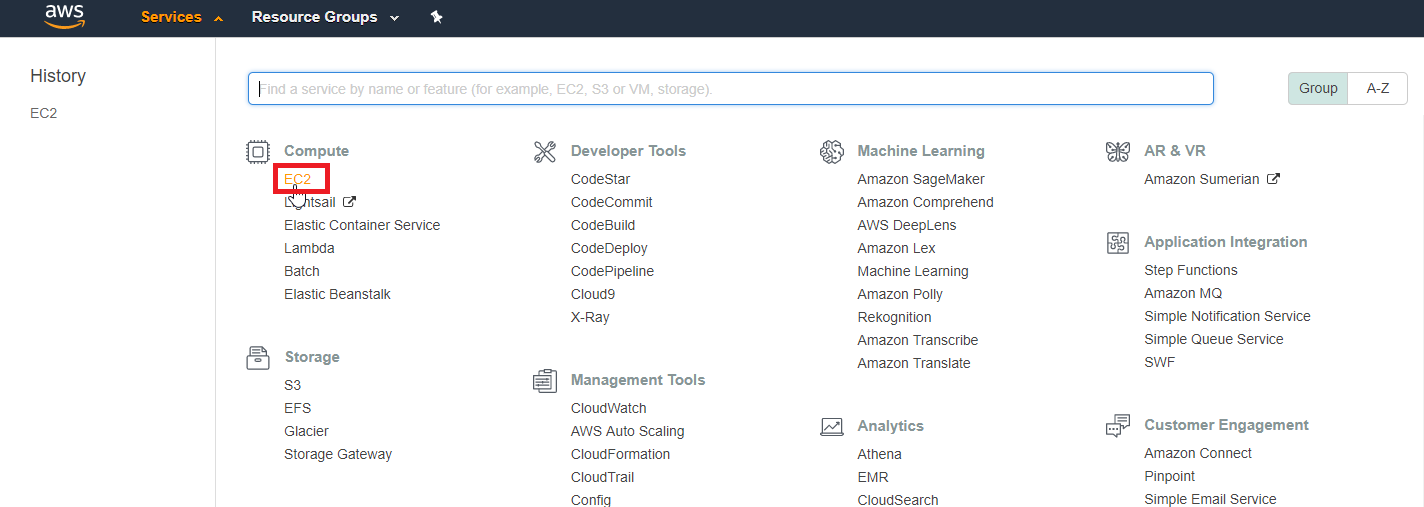
AWS Menu EC2
Select Instances on the left hand side and select Launch Instance in the new menu that pops up.
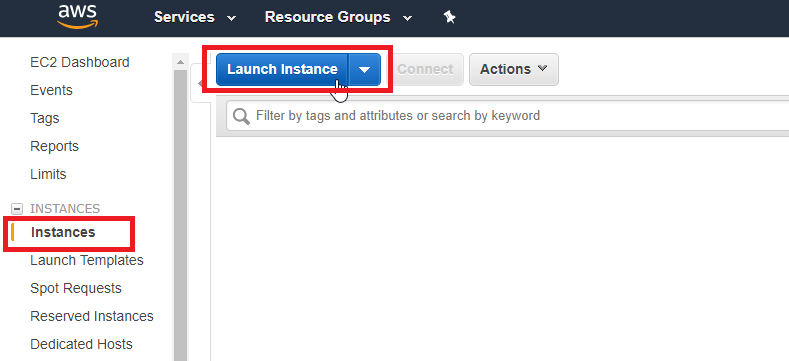
Launch Instance
You will now see a new screen which shows you all the different type of Amazon Machine Images (AMIs) that are available. Select Free tier only and select the Ubuntu Server as this will be the type of server we will be using for this tutorial.
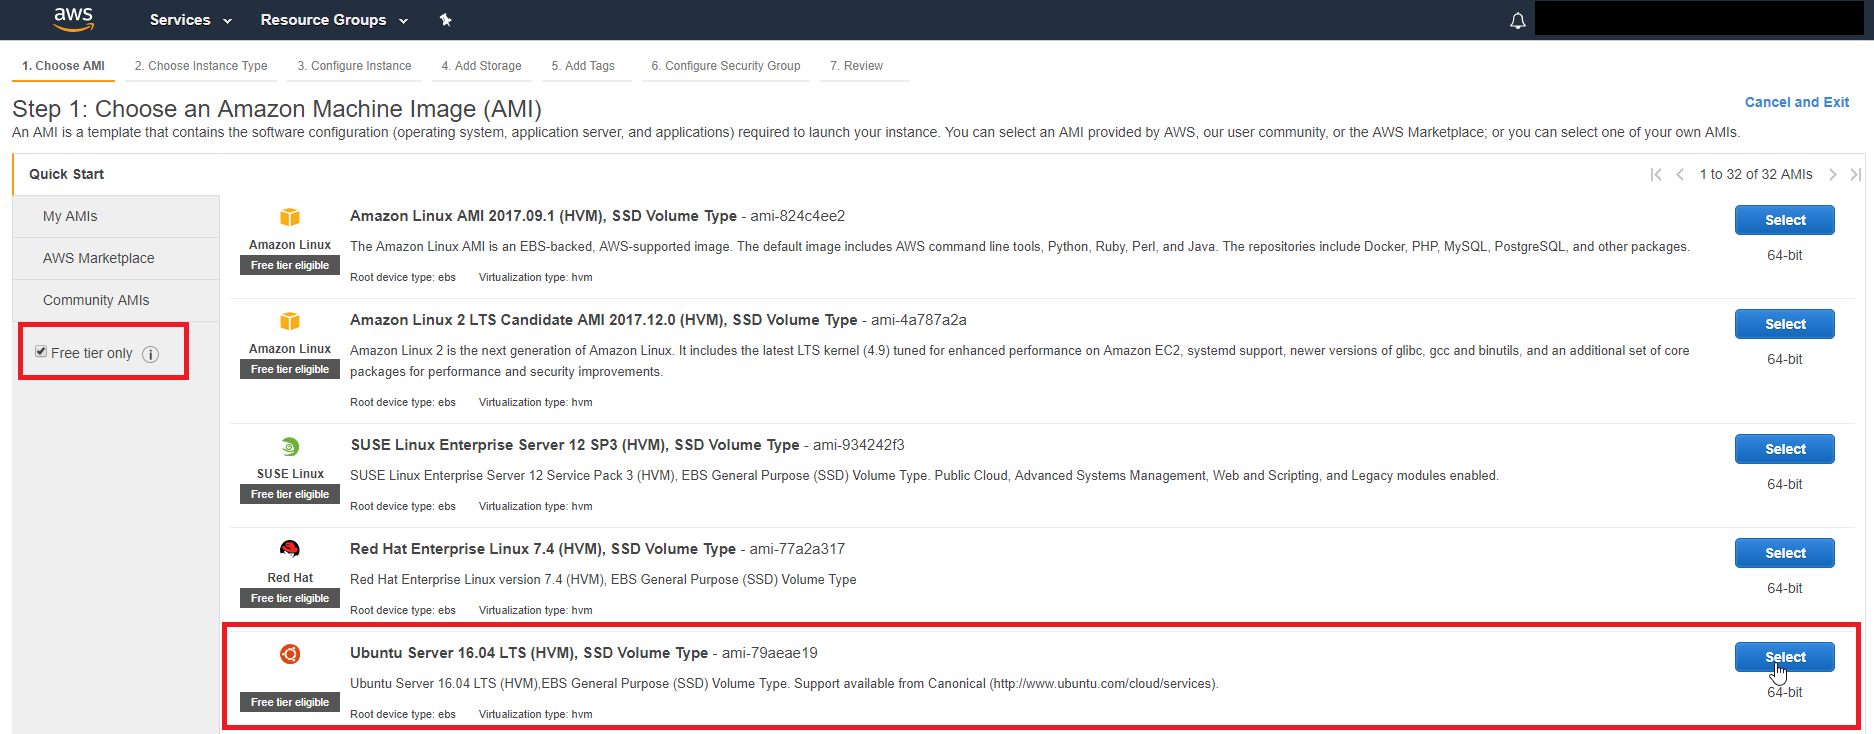
Amazon Machine Image Free Tier
A new screen will be shown which will allow you to choose the type of instance. Again, select the Free tier eligible instance.
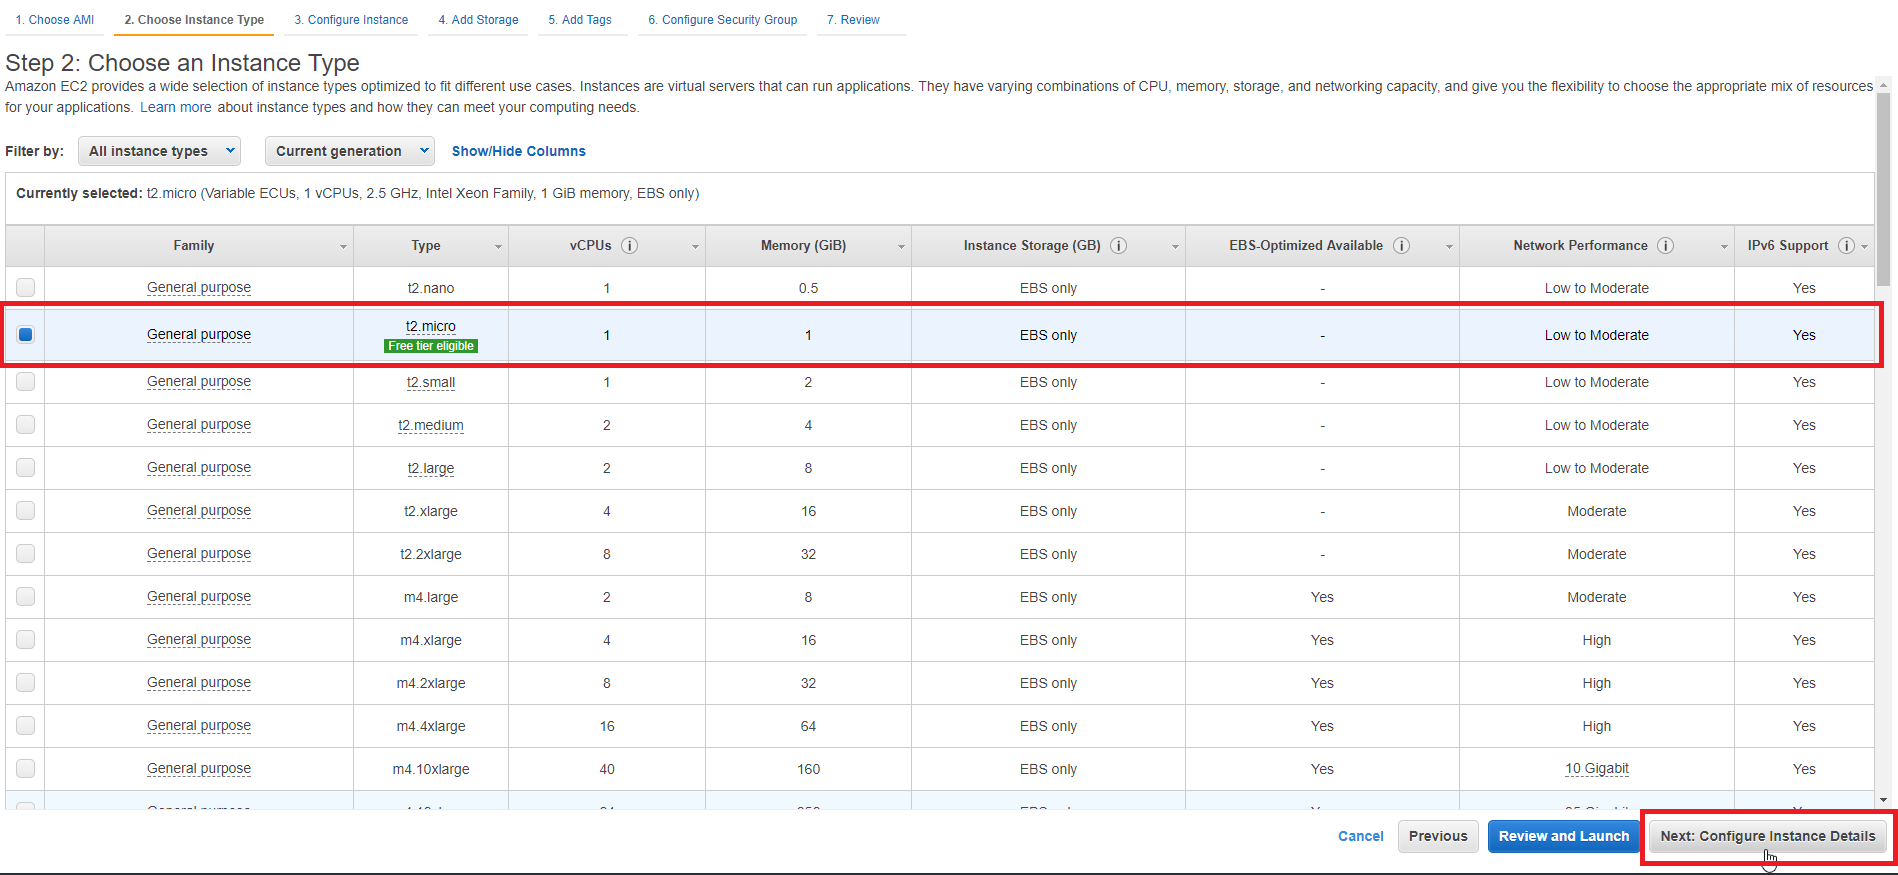
Instance Type
Next is the configuration of the instance; the default settings are fine here.
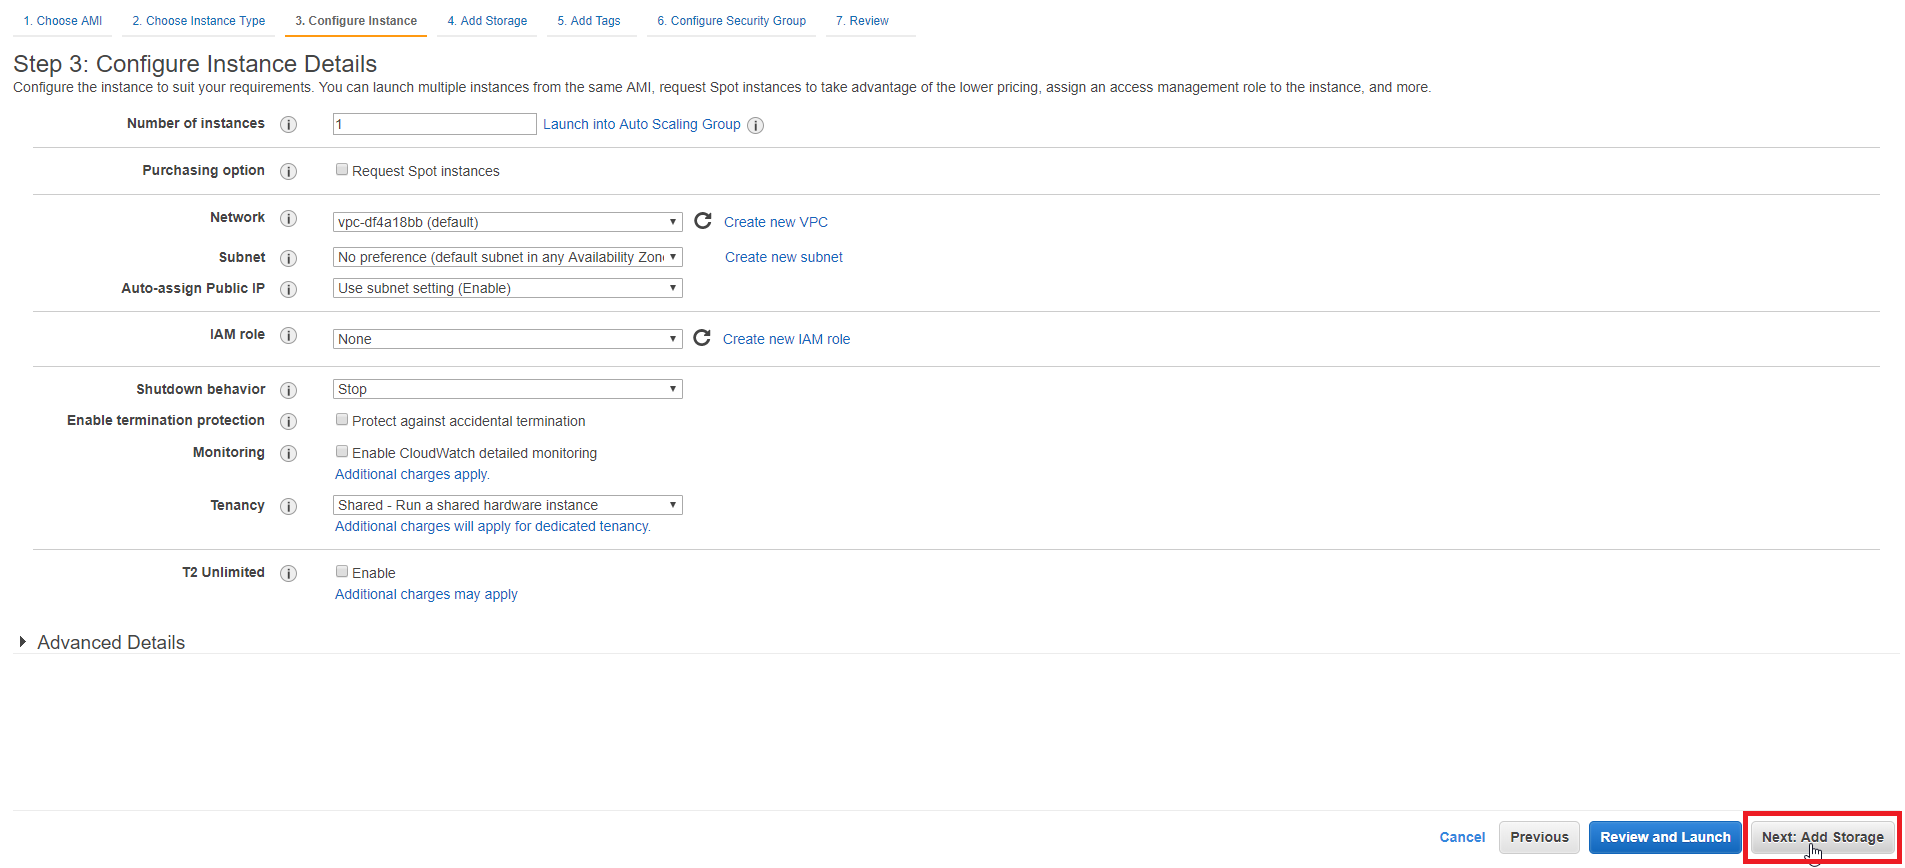
Instance Details
Now you can modify the storage for you instance. The default storage of 8 GBs is fine for now as this is a basic website.
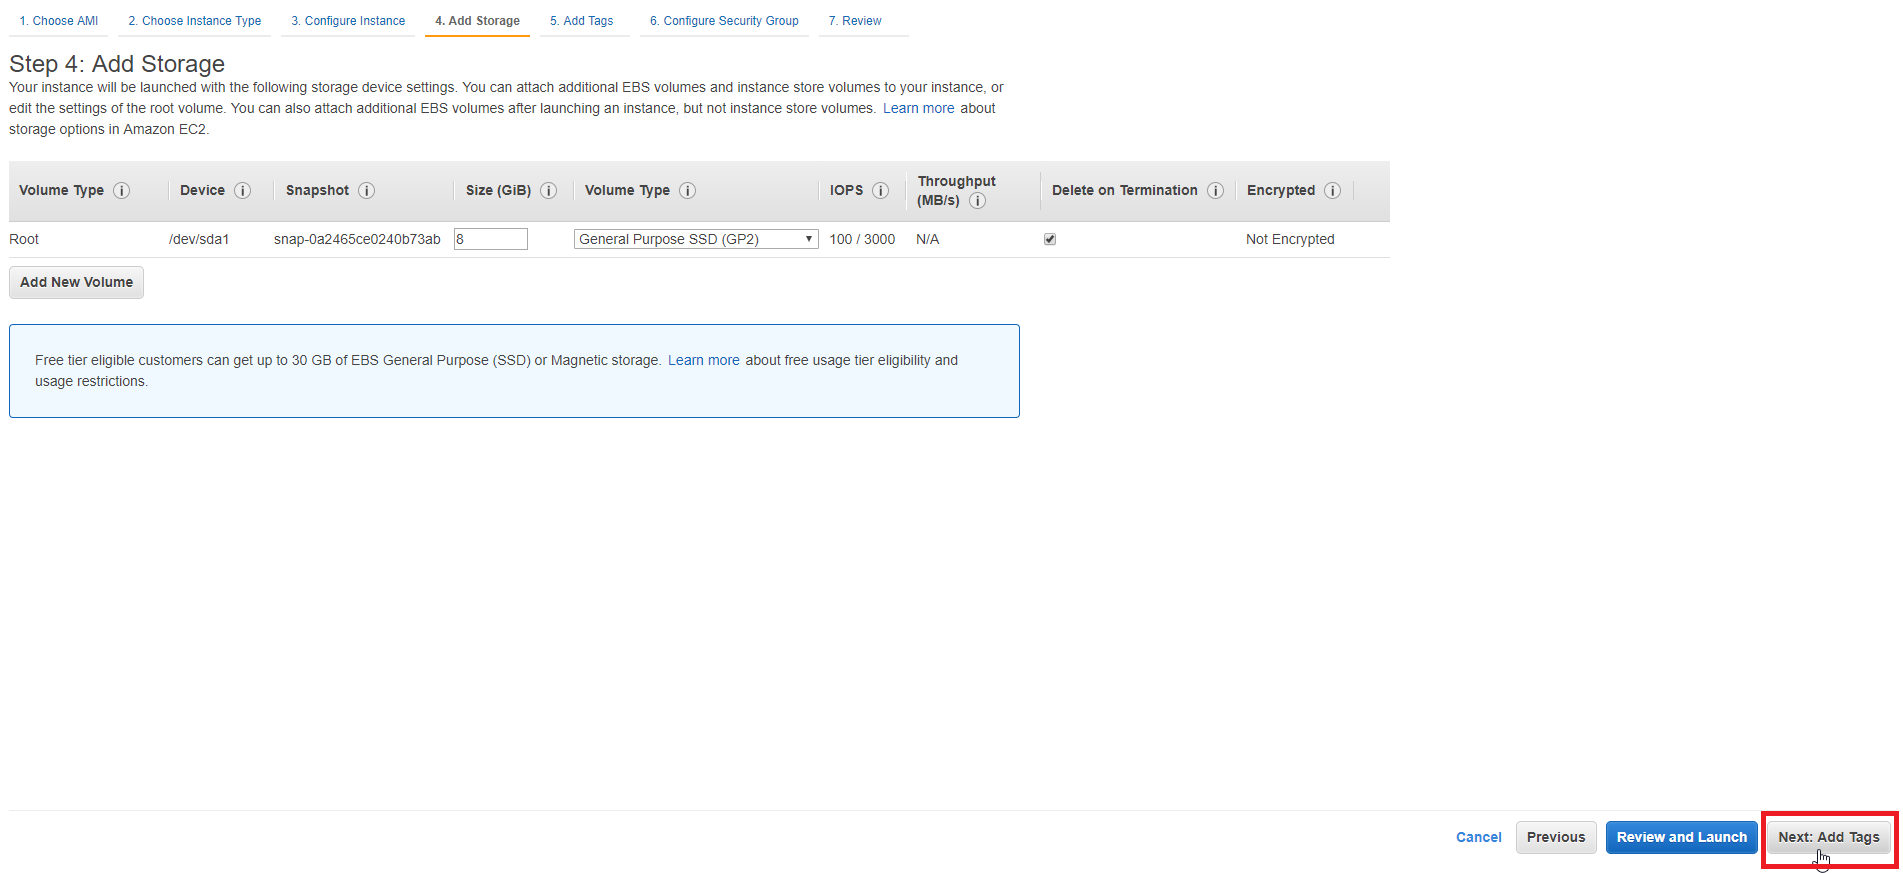
Add Storage
No need to add tags, but you can if you want. It is just easier to identify each instance if you tag them for when you have multiple instances running.
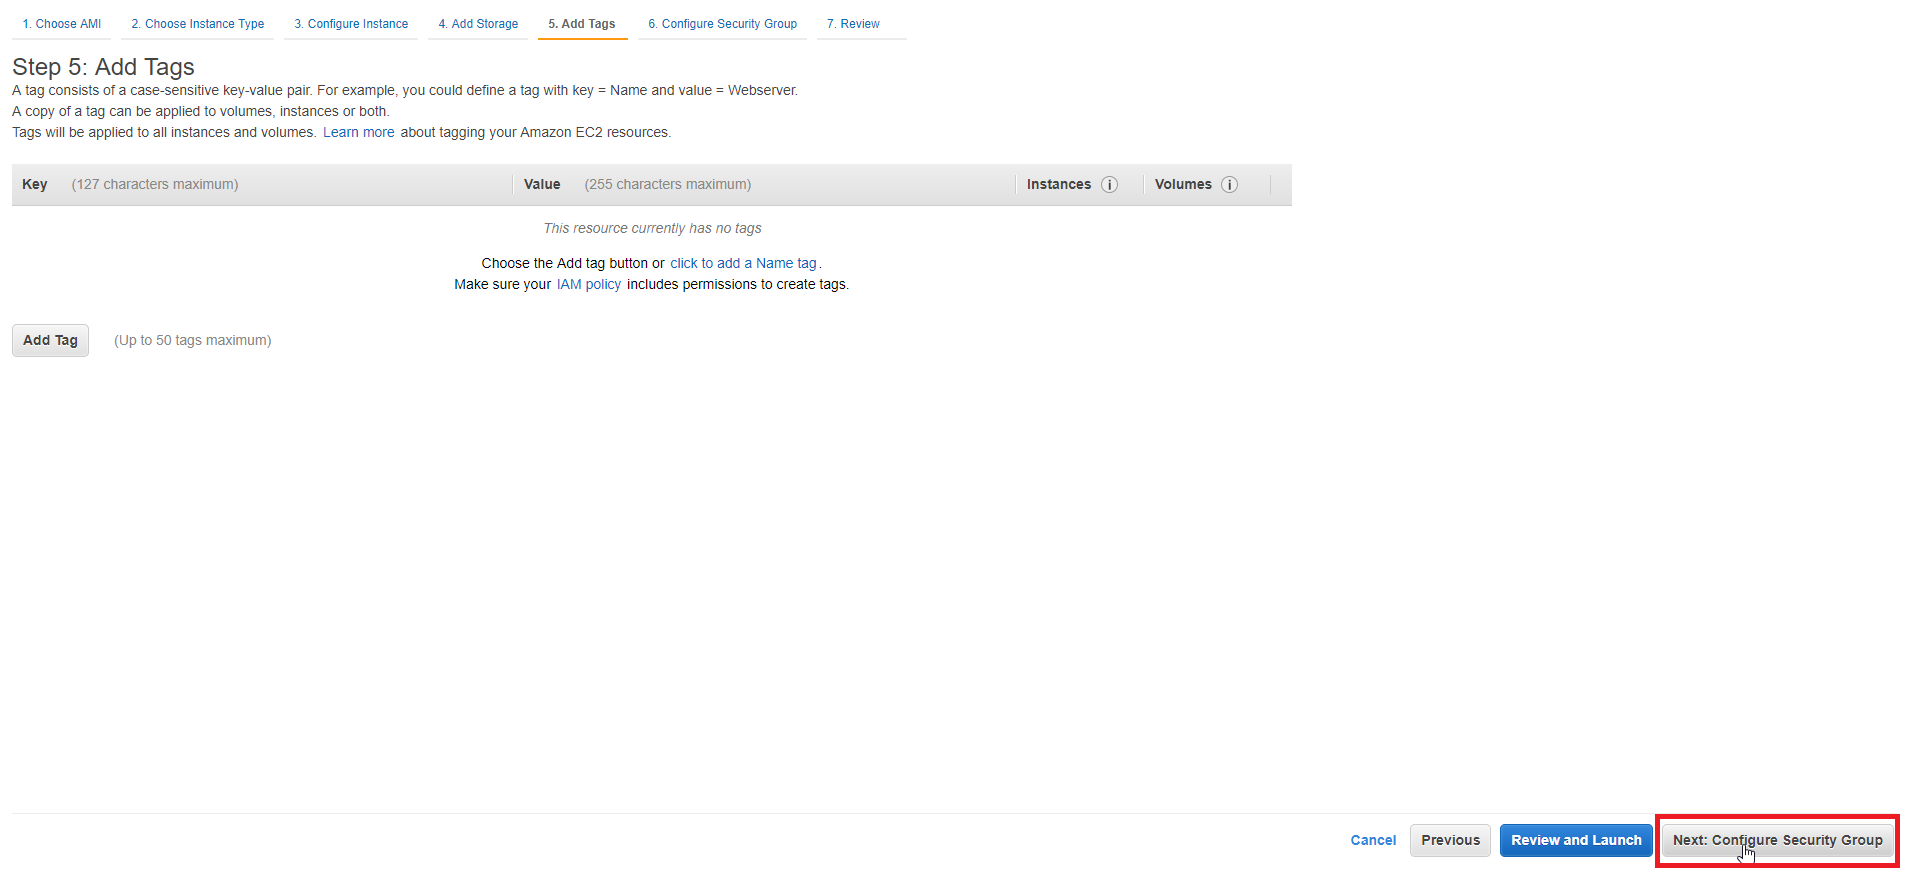
Add Tags
The Security Group settings are important as one does not want unauthorized personnel logging into their server. Create a new security group and give it a name. The Secure Shell (SSH) security protocol allows users to connect to servers remotely. You should only have your IP or a range of trusted IPs listed underneath the Source column for this security protocol. For now, you can just change the Source to My IP in the dropdown menu to select your IP. You must also select Add Rule and select HTTP in order to allow others to see your website. The Source can be left as is as you want people to visit your website.
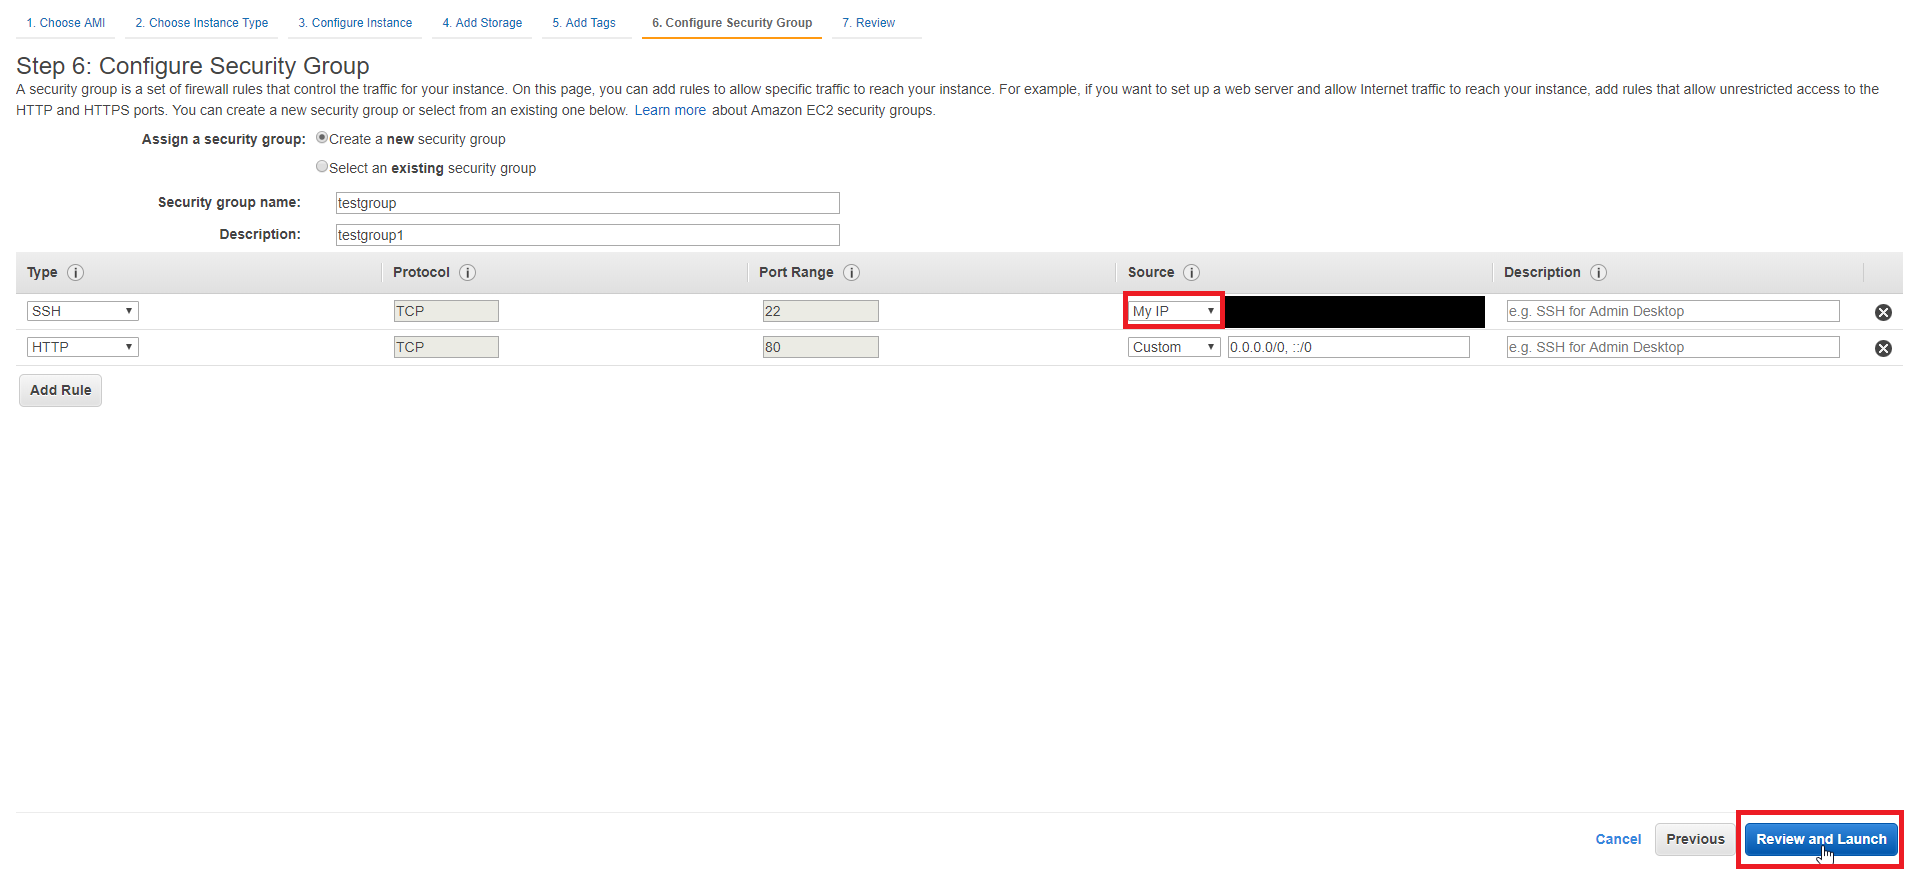
Security Group
In the review window select Launch in order to begin launching your instance.
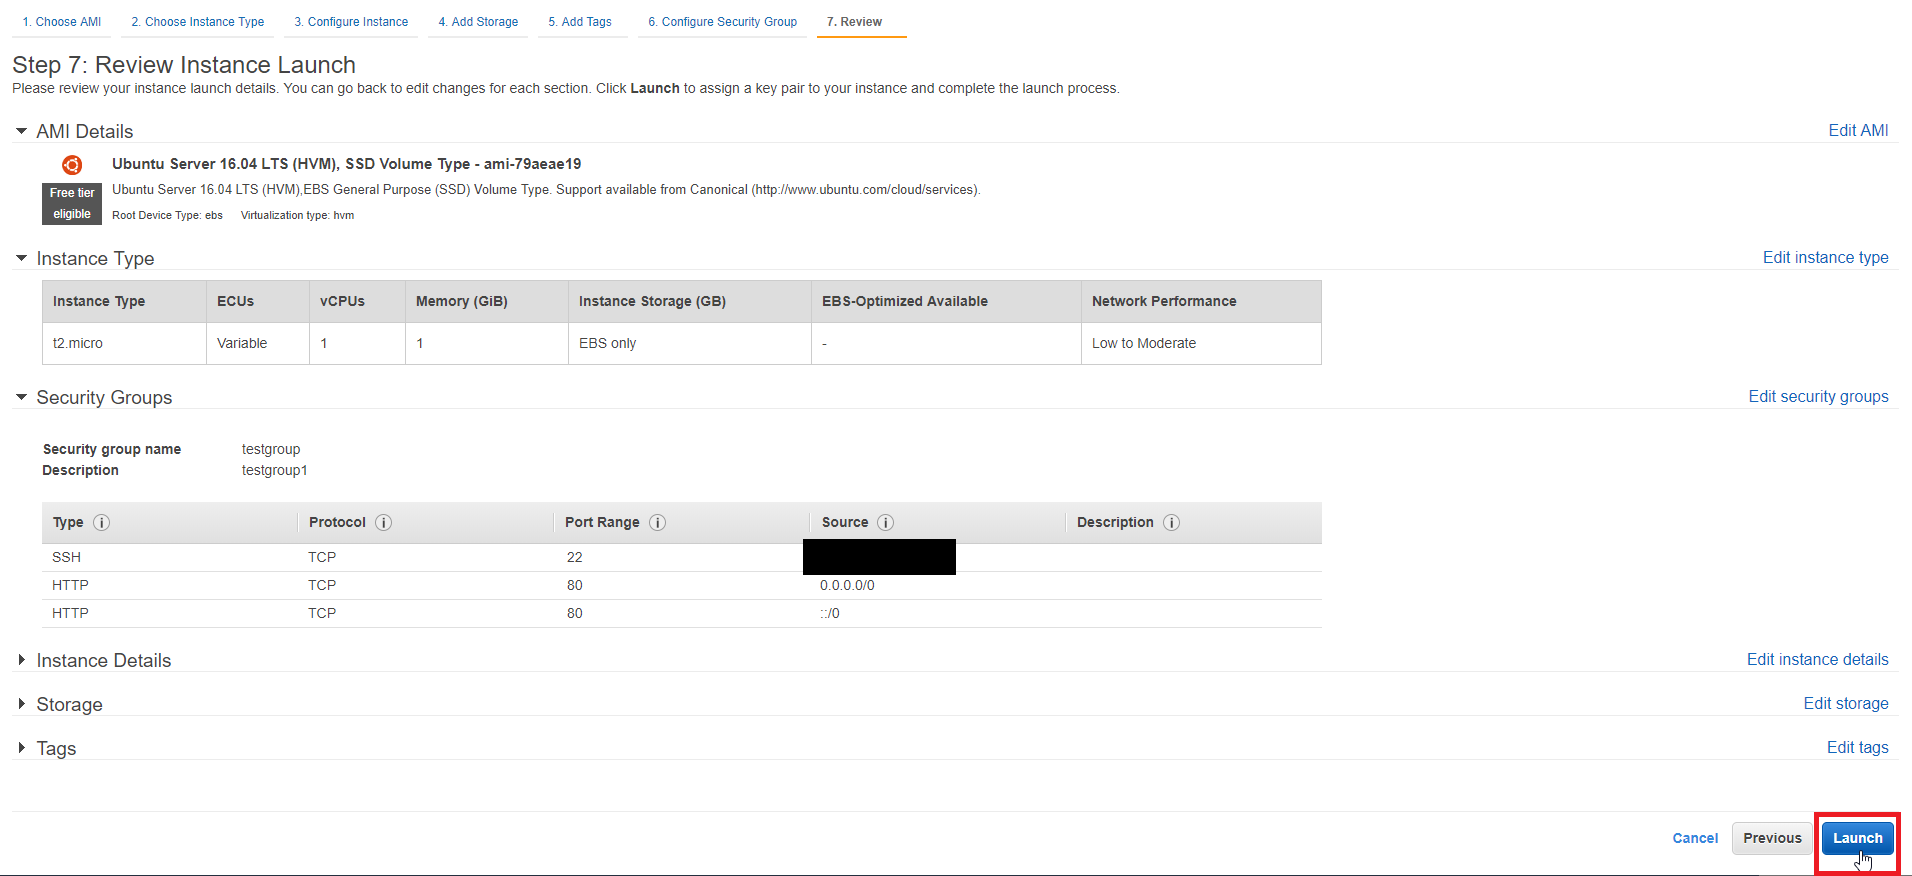
Review and Launch
A dialogue window will pop up that will allow you to create your public and private key for which you need in order to connect to the server remotely. Give the Key Pair a name and your private key should start downloading. The public key is kept by the server in order to confirm the Key Pair. Select Launch Instances to launch your instance.
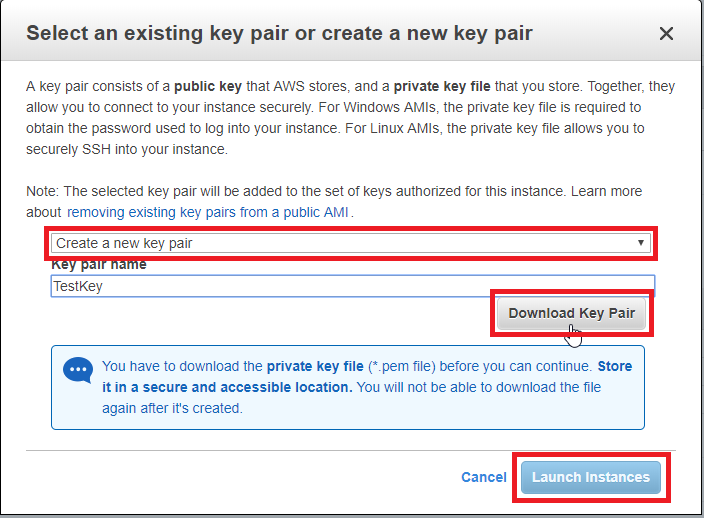
Key Pair
Select Instances on the left hand side and you should now see your running instance. The Public DNS (IPv4) is the address you put in your browser if you want to go to your website. However, your website will not be available right away as we still need to install some packages on the server in order to create the website.
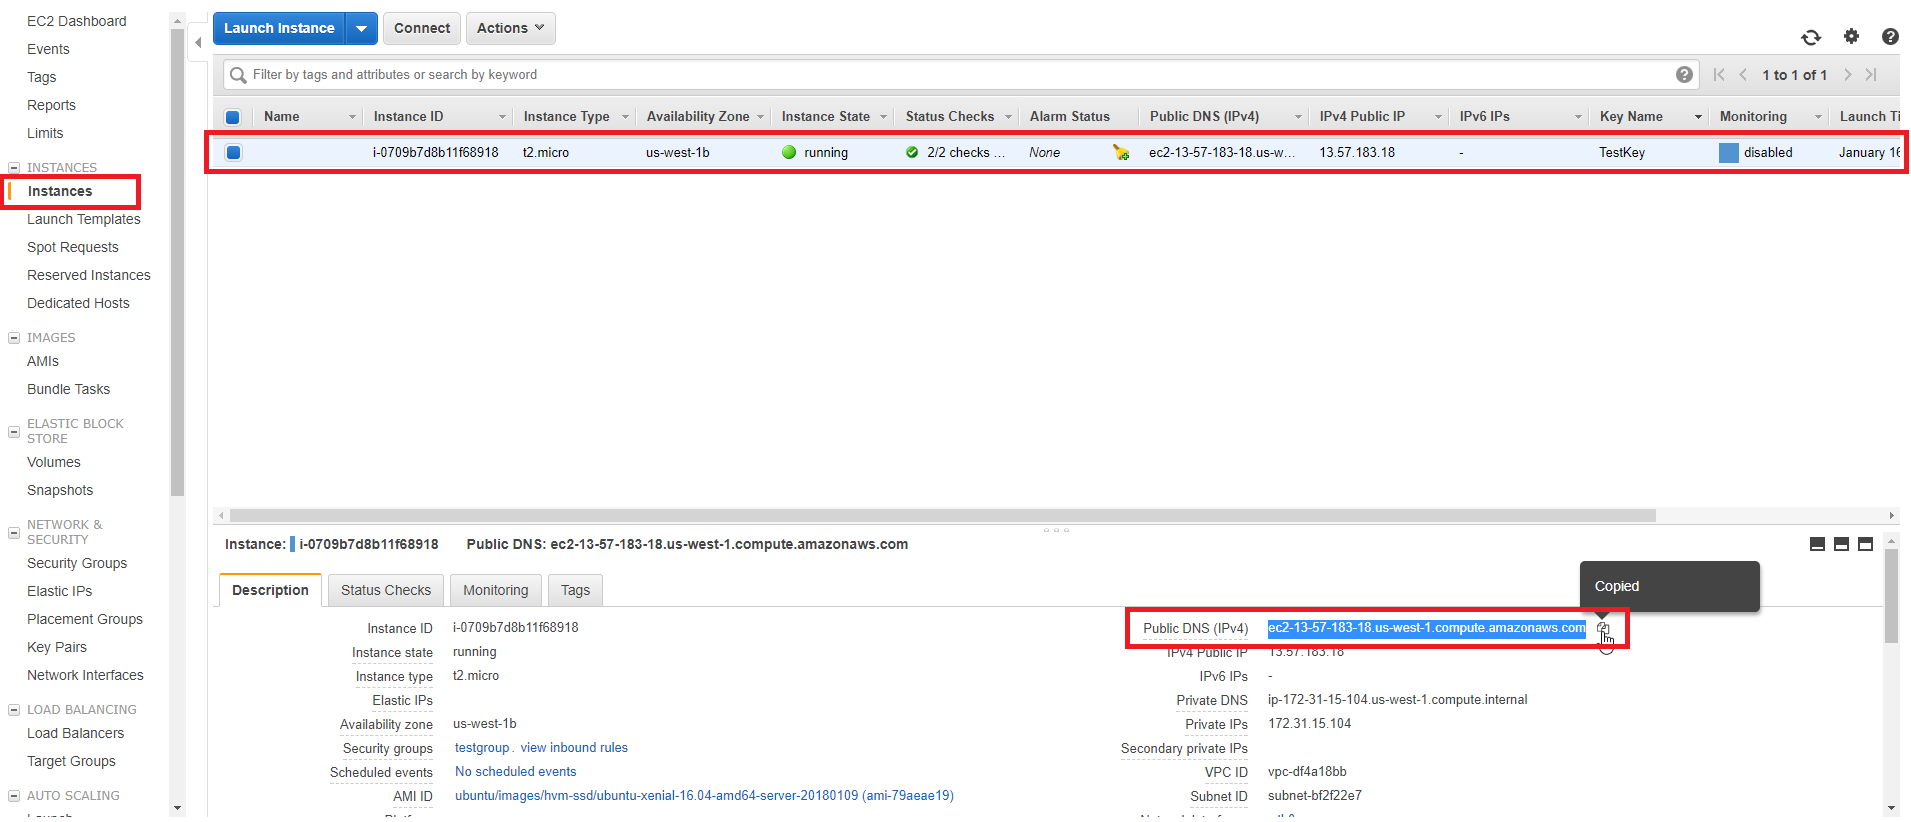
Running Instances
Installing LAMP
The next step in creating our website server is to install LAMP which is an acronym for Linux, Apache, MySQL, and PHP. This combination of packages will allow us to create a multifunctional server. We must first connect to our server to install these packages. I will be using the PuTTY software for this tutorial which can be downloaded from their website. Download their latest release and install the software on your computer. We must format the private key we downloaded earlier into a format that PuTTY can read. Open up PuTTYgen and load your private key from before.
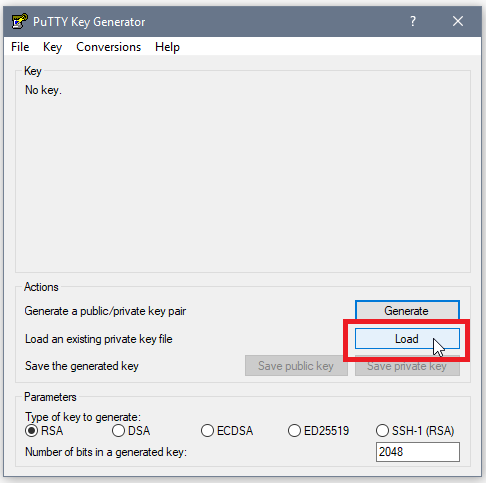
Key Generation
A bunch of random numbers and letters should show up once your key has been loaded. Add a passphrase to the private key if you would like to make it more secure. Select Save Private Key and store it somewhere secure.
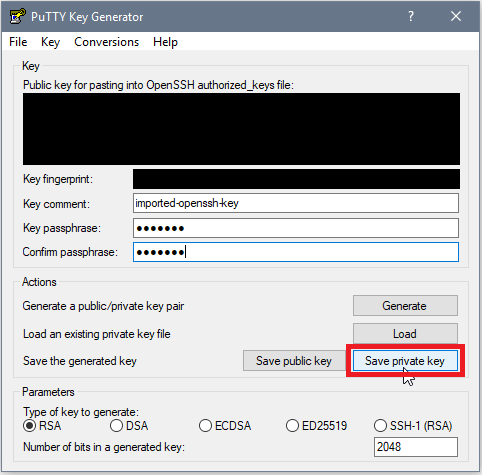
Save Private Key
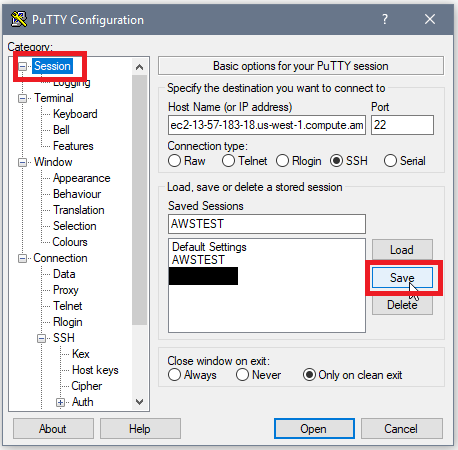
Open up PuTTY and paste the Public DNS (IPv4) address in the Host Name (or IP address) box. The port number should be 22 if the SSH security protocol Port Range was left alone when modifying the Security Group for the instance that was created. Under Saved Sessions, give this session and name and select save.
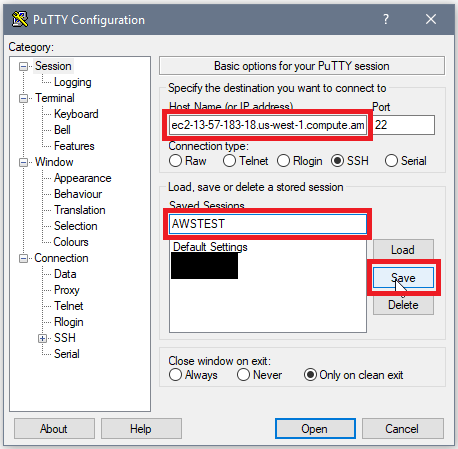
PuTTY Save Session
Now on the left hand side under Connection->SSH->Auth, there should be a section to browse for your private key. The private key which you are trying to find should have the extension .ppk and is the one you created with PuTTYgen.
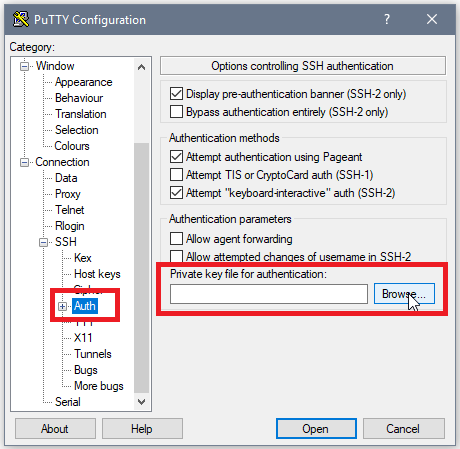
Browse Key
Select Sessions on the left hand side and save again in order to save your session with your private key location.
Save Key Settings
Select Open to begin your remote login session on your server. If it is your first time logging in, you should be greeted by a security alert message. Select Yes as this host is the server you are trying to connect to.
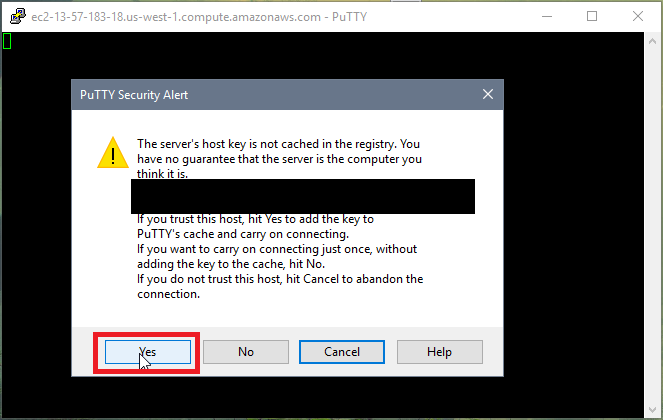
Security Alert
The prompt is going to ask you who you want to login as, type in ubuntu as this is the default user for this server and hit enter. Type in your private key password if you created one earlier using PuTTYgen.
Note: There will be no asterisks when typing your password like on websites but rest assured that you are indeed typing in your password.
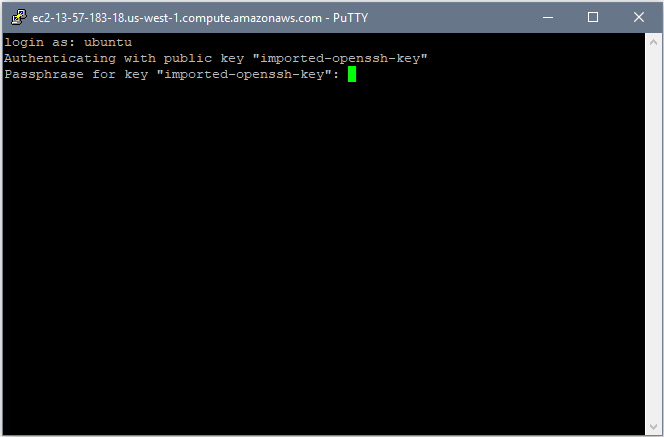
Ubuntu Password
You should be greeted with the screen below if your login was successful. Now we can start downloading the packages needed to host your website. We are already using a Linux based OS (Ubuntu) so that takes care of the L in LAMP.
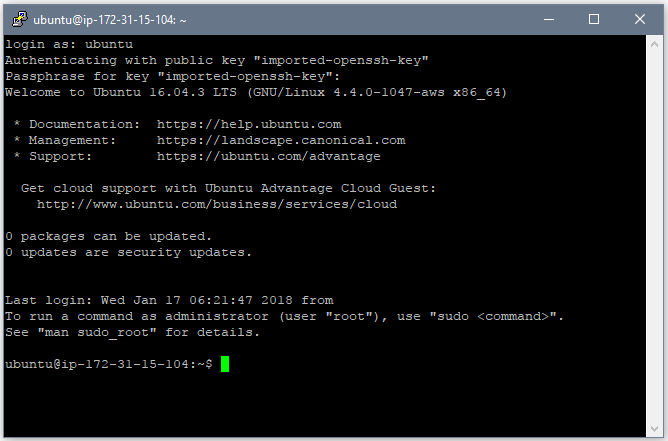
Logged In
In order to start downloading the necessary packages, we first need to update the list of packages available to their newest versions. You can copy the code below and paste it in the terminal by right clicking in the terminal window; there is no right click paste option.
sudo apt-get update
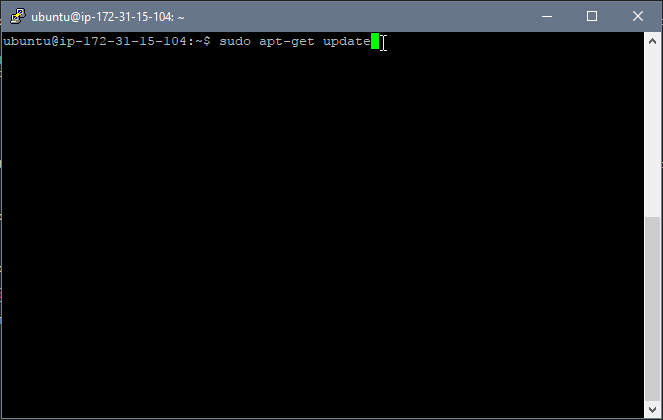
Update
We will now install Apache which is the web server package and also the A in LAMP. A prompt will ask if you want to install the package for which you can type y and hit enter for yes.
sudo apt-get install apache2
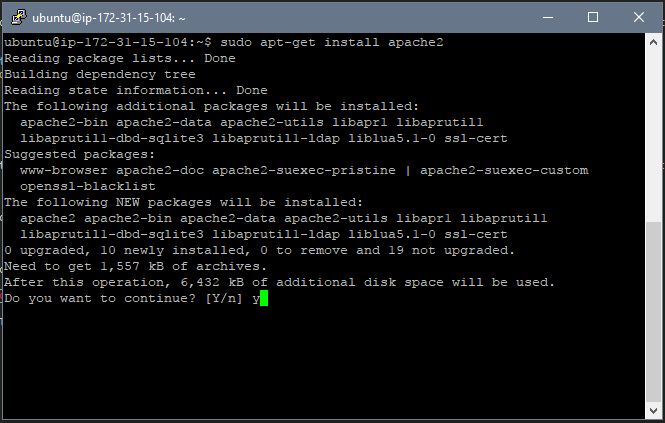
Apache
After Apache has been installed, you can go to the Public DNS (IPv4) address in your browser to see the default Apache index.html file stating that the installation was successful. That takes care of the A in LAMP.
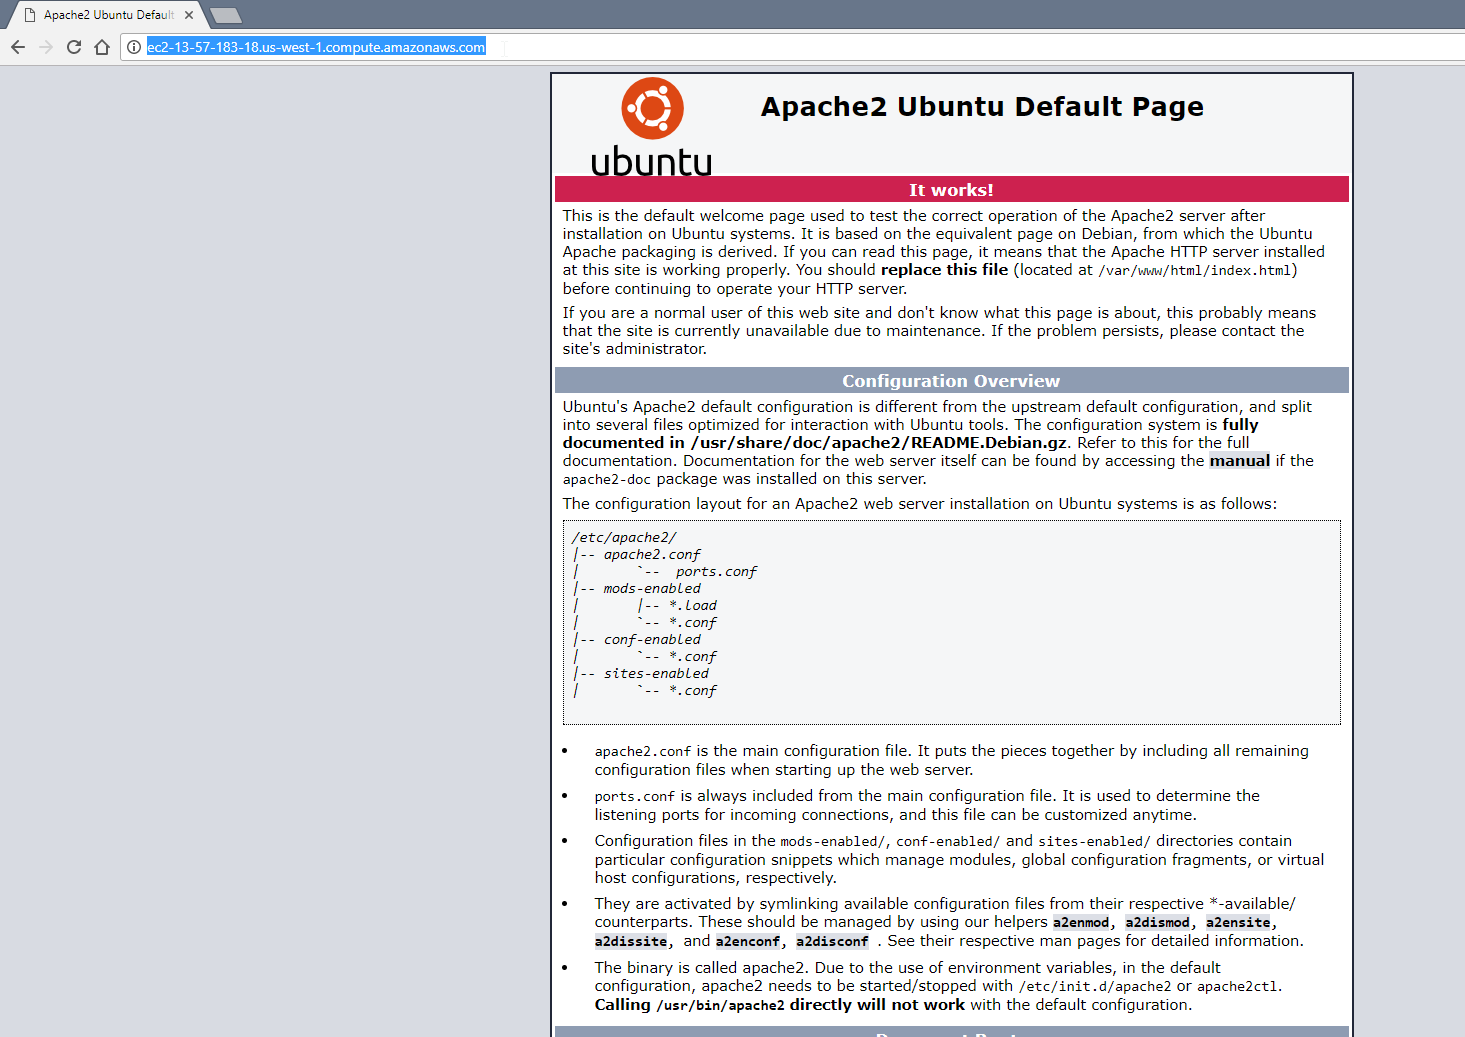
Apache It Works!
Next we will install MySQL which is a data management system package and also the M in LAMP. Again type y when asked to proceed with the installation.
sudo apt-get install mysql-server
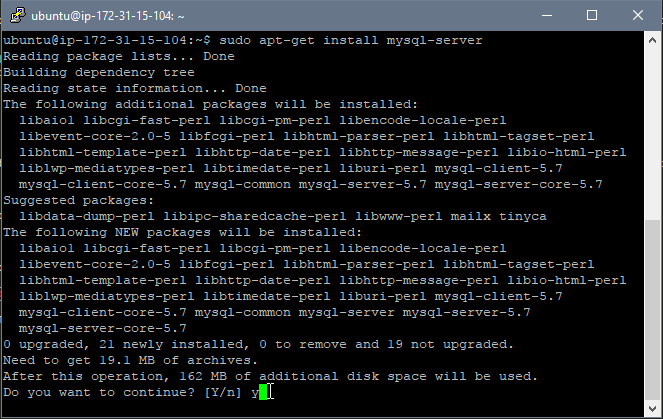
MySQL Server
A prompt will ask you to create a password for your MySQL root user and confirm it.

MySQL Server Password
Now we will edit some of the settings in MySQL to make it more secure. The first setting will ask you if you want to validate passwords by making them meet a certain criteria. Select yes and then select the password validation criteria of LOW, MEDIUM, or STRONG by selecting 0, 1, or 2 respectively. For this example I chose LOW by typing 0. It will then ask you if you want to change your MySQL password for the root user. The next four questions deal with the security of MySQL, select yes for all of them. The first question removes anonymous users, the second question removes the possibility of the root user logging in remotely, the third question removes the test database, and fourth question makes sure the changes are applied immediately.
sudo mysql_secure_installation
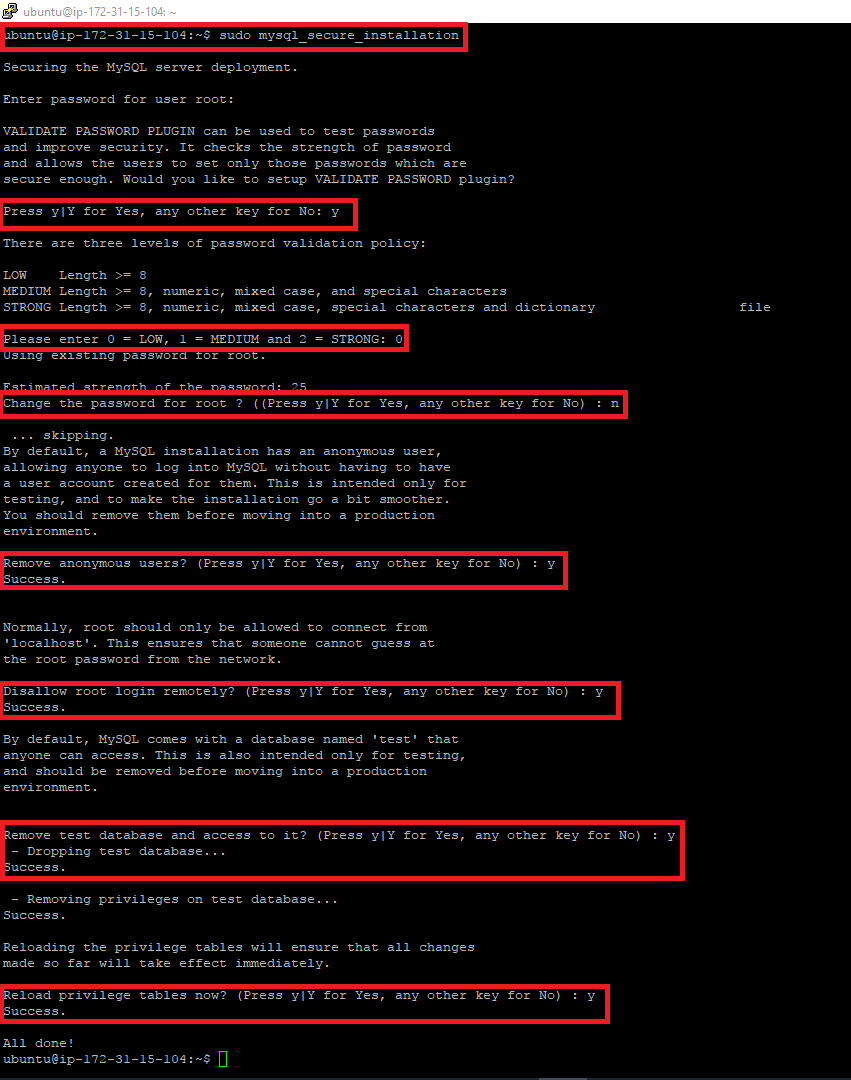
MySQL Server Secure Installation
Next we will install MySQL Client which allows you to interact with other MySQL databases remotely. That takes care of the M in LAMP.
sudo apt-get install mysql-client
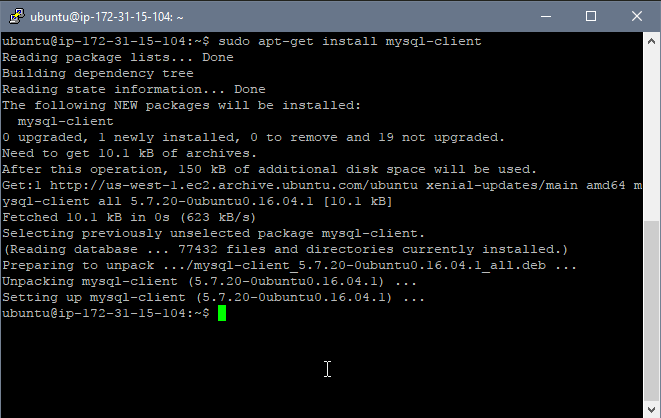
MySQL Client
The last letter in LAMP is P which represents PHP. PHP can be used alongside HTML and CSS in order to make a more dynamic website.
sudo apt-get install php
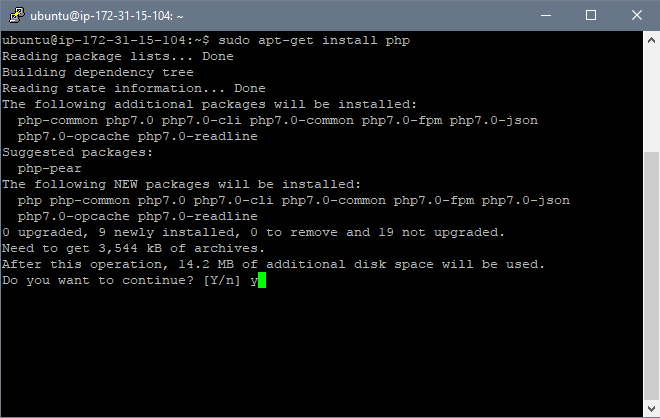
PHP
Next we will install the Apache PHP module which will allow for faster PHP execution for the web server. More detailed information can be found here. That should take care of the P in LAMP.
sudo apt-get install libapache2-mod-php
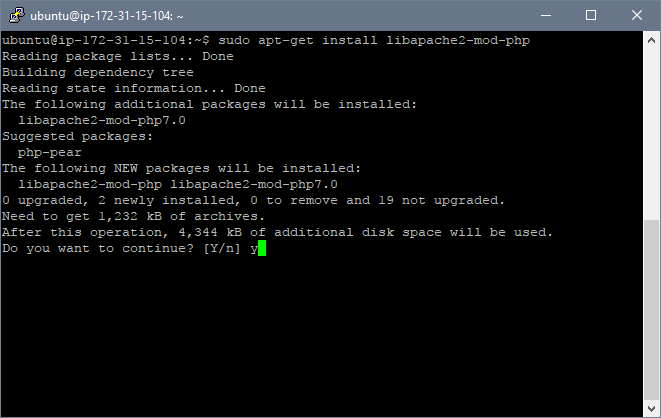
PHP Module
Restart apache2 and mysql just to make sure everything has been applied.
sudo service apache2 restart
					    sudo service mysql restart

Restart
We must now locate the directory which contains the index.html file and thus the directory for our website. Paste the code below into the terminal in order to change directories (cd) to /var/www/html which is the location of our website files.
cd /var/www/html
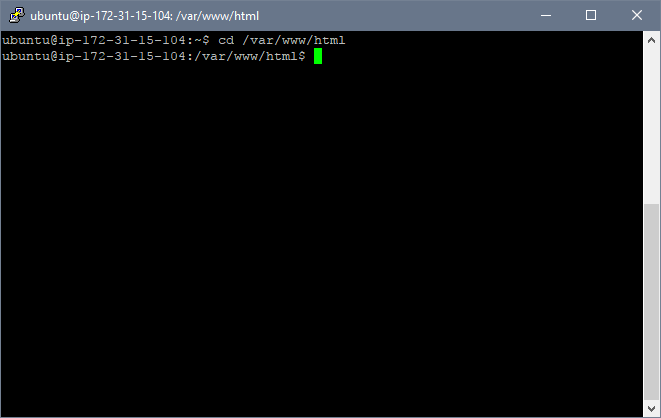
Change Directory
Now remove (rm) the index.html file that is currently in this directory by pasting the code below. The current index.html file is the Apache home page you saw earlier in the tutorial. Deleting and creating a new index.html file is just easier than editing the current one.
sudo rm index.html
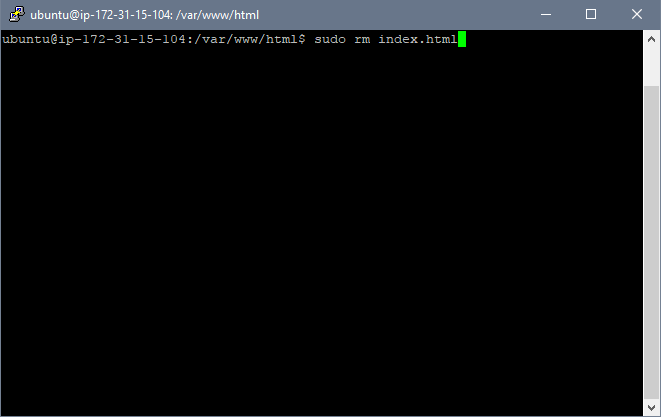
Remove Index
Create a new index.html in this directory by pasting the code below. The command vi opens the default visual editor for Linux systems and we will use it to create our index.html file.
sudo vi index.html
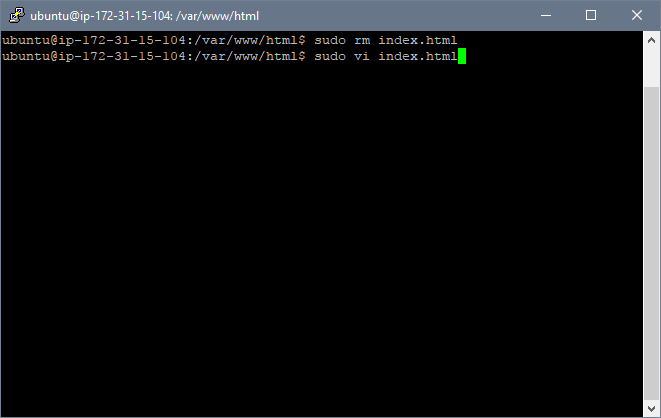
Create Index File
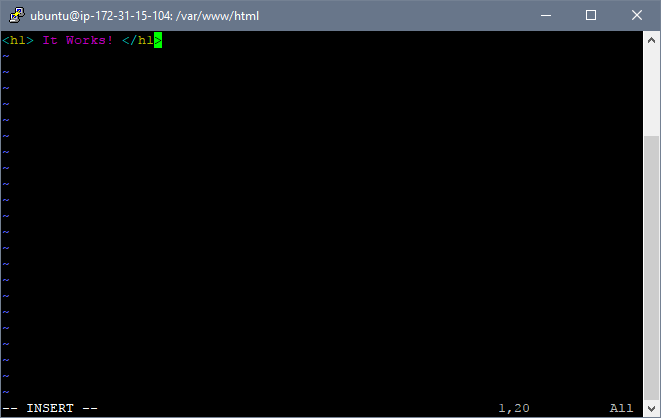
You will now be in the visual editor and be able to edit the index.html file. Start by pressing the letter "i" on your keyboard and the text "-- INSERT --" should now appear at the bottom of the terminal. Paste the HTML code below and press the "ESC" key to exit the "-- INSERT --" mode.
<h1>It Works!</h1>
Edit Index File
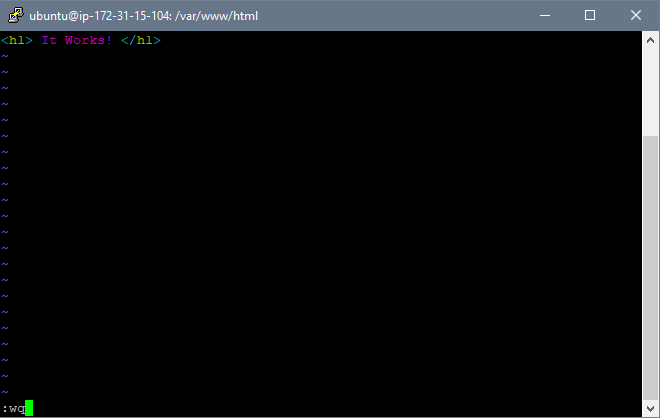
After you have pressed the "ESC" key, you should be able to type :wq which allows you to write/save (w) and quit (q) the file. Hit enter and you should have exited the visual editor.
:wq
Exit Index File
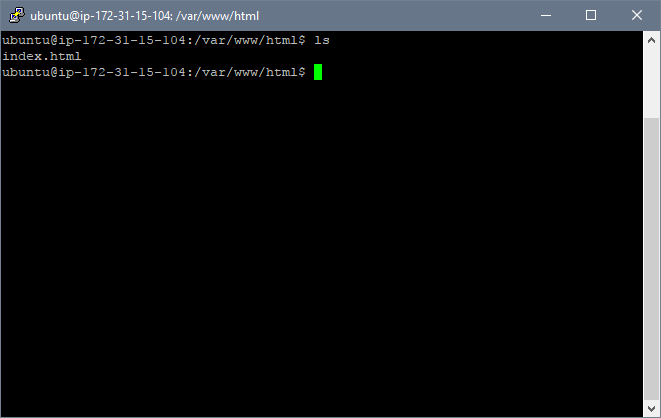
Now type ls in the command window which is the command that lists what is in the directory. You should see your index.html file.
ls
List Files
Open up your web browser and go to your server address in order to see your updated index.html file. Now we can start adding files to create our website.
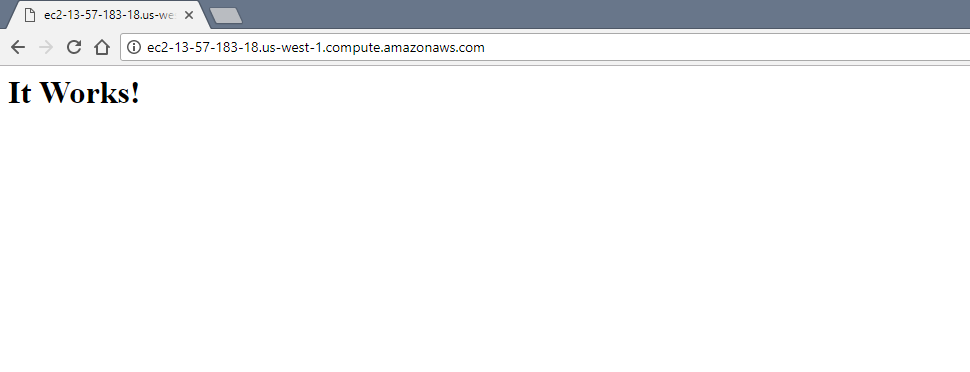
EC2 It Works!
One more setting should be changed in Apache before we continue forward. Currently people that visit the site are able to see directories and their contents. I have created a couple of test directories using the command below.
.sudo mkdir test
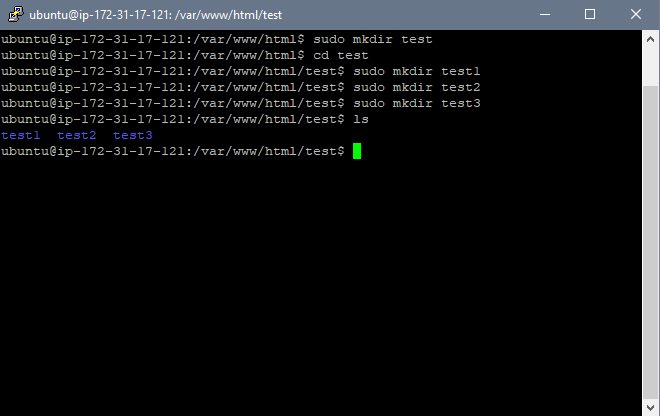
Making Test Directories
If we go to our site and type /test/ after the URL we will be able to see the contents of the directory /var/www/html/test.
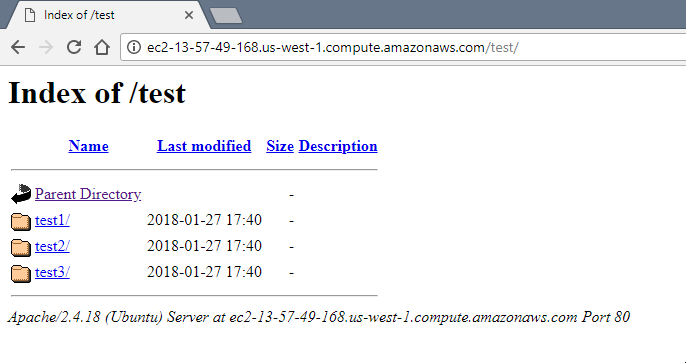
Test Directories on Website
In order to prevent this, go to the directory /etc/apache2 and edit the file apache2.conf.
.cd /etc/apache2
sudo vi apache2.conf
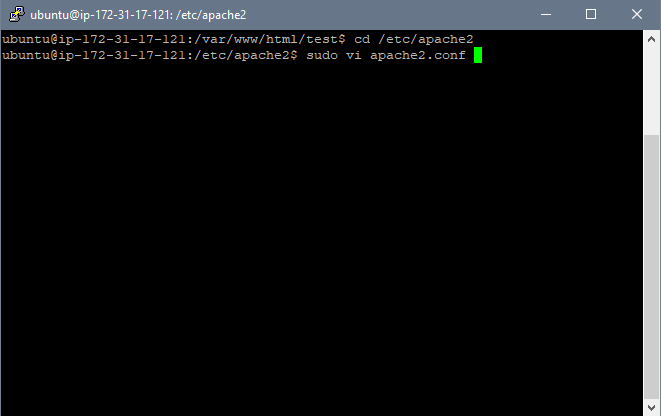
Apache Configuration File
Scroll down the file with the arrow keys until you find <Directory /var/www/> and delete Indexes under Options. Save and quit the file.
:wq
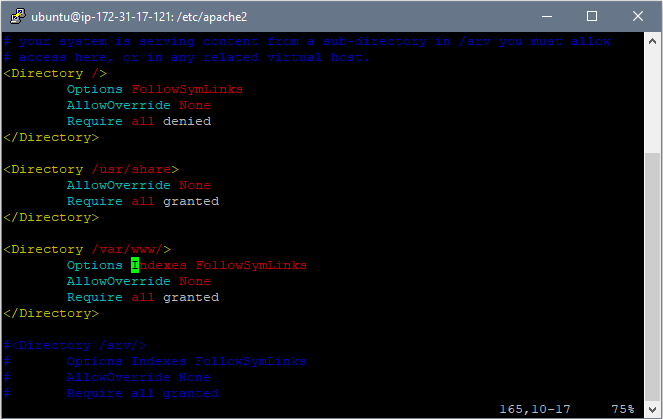
Editing Apache Configuration File
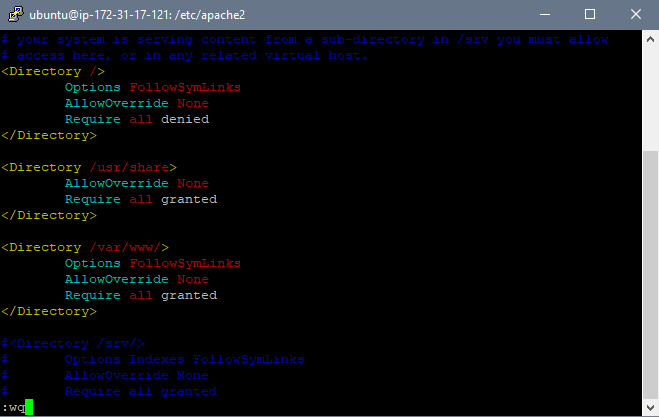
Editing Apache Configuration File Remove Indexes
Restart your Apache server with the command below.
sudo service apache2 restart
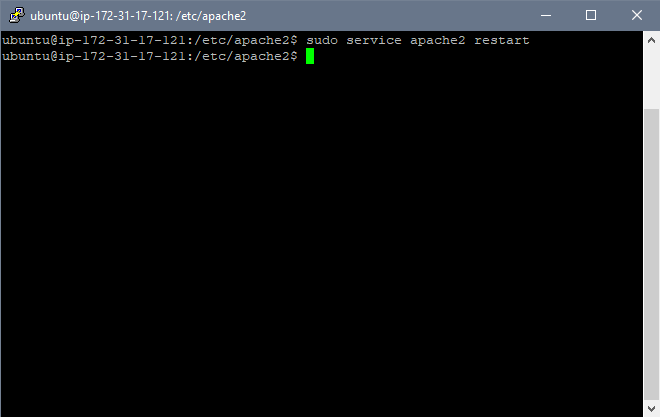
Restart Apache
Now if we go to our site's /test/ directory we will be greeted with a 403 Forbidden error message instead of the contents of the /test/ directory.
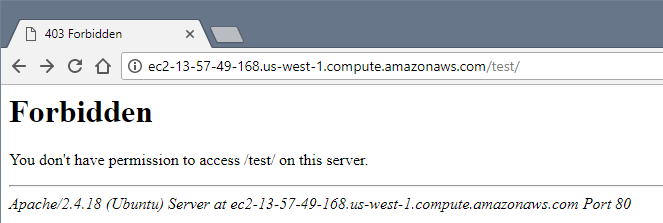
403 Forbidden
Modifying Permissions
This is great! Now we can start adding files to this directory in order to create our website. You can use the vi editor to create and edit files but I prefer to use the Sublime Text Editor as it will be a much less cumbersome and tedious process. We must also download a software which allows us to easily transfer files from our desktop to our server, I like to use WinSCP. This way we can easily create our files using the Sublime Text Editor on our desktop and easily transfer them over to our server. Once you have downloaded and installed the software, you should be greeted with the following screen. Select New Site and enter your credentials then click on Advanced.
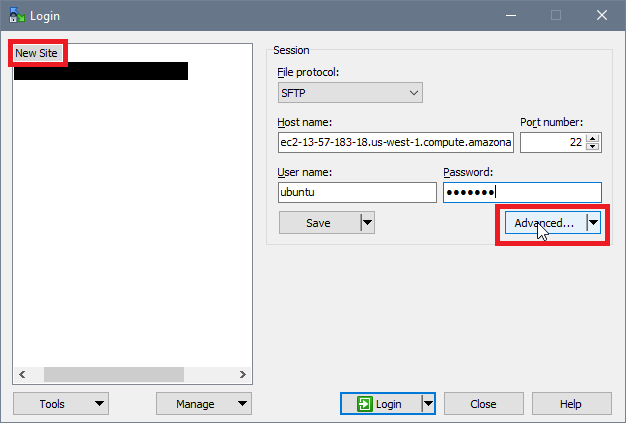
WinSCP
In the Advanced settings, select Authentication under SSH and find your private key. This is the same file you used to connect to your server using PuTTY. Select OK and Login.
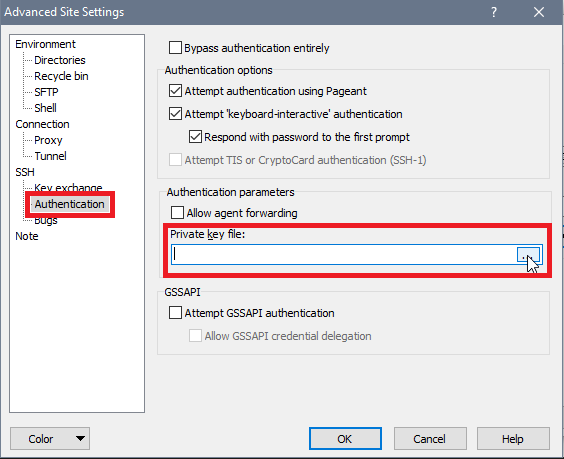
WinSCP Private Key
You will receive the same warning about connecting to the server as you did when connecting with PuTTY. Select Yes and another prompt will ask you to enter your private key password if you added one using PuTTYgen.
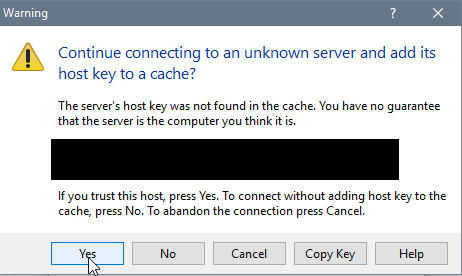
WinSCP Security Alert
You will now be logged in to your server and be able to navigate it by clicking on folders and changing directories. Right click on the menu bar where it states the Name, Size, Changed, Rights, and Owner of the files in order to add the Group column which will be useful in a bit. I have added a test file titled test.html in order to see the Owner and Group columns filled in for that file. You are in your default directory but we must go to the /var/www/html directory where our website files will be located. Select the icon which moves you up a directory until you see the /var directory and then select that until you reach the /var/www/html directory.
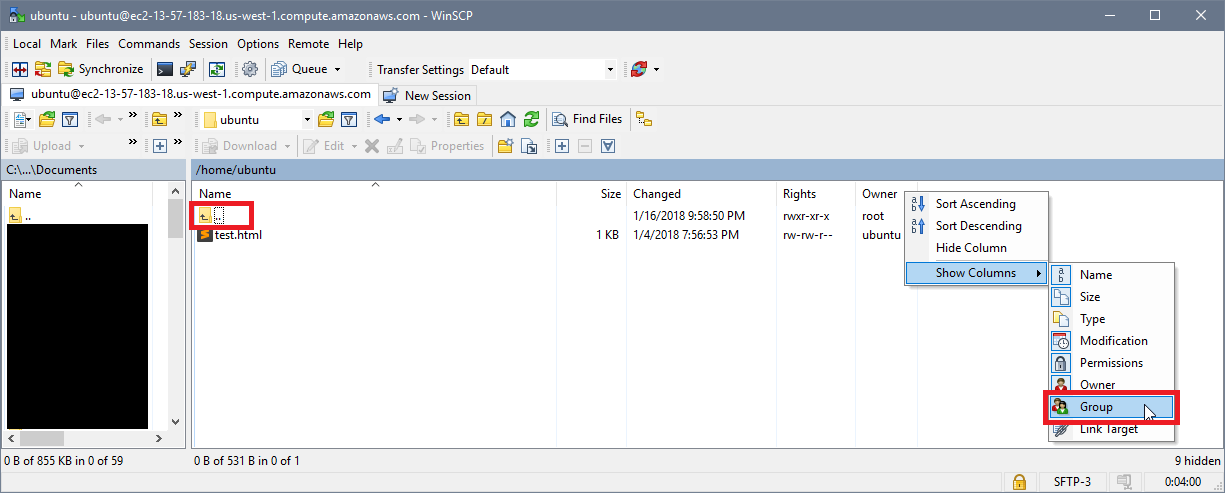
WinSCP Interface Without Group
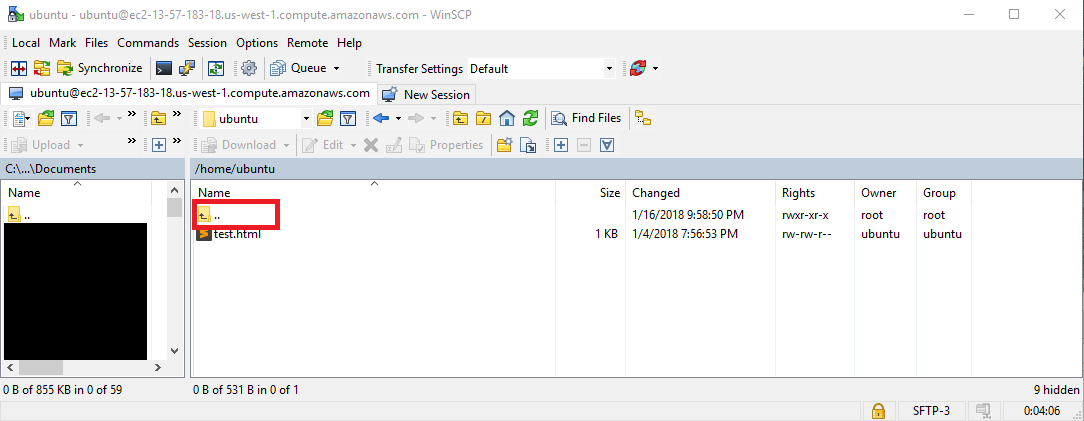
WinSCP Interface With Group
You will now be in the /var/www/html directory and will be able to see your index.html file. Here is where you can drag and drop files for your website from your desktop to your server which you have made using your preferred text editor.
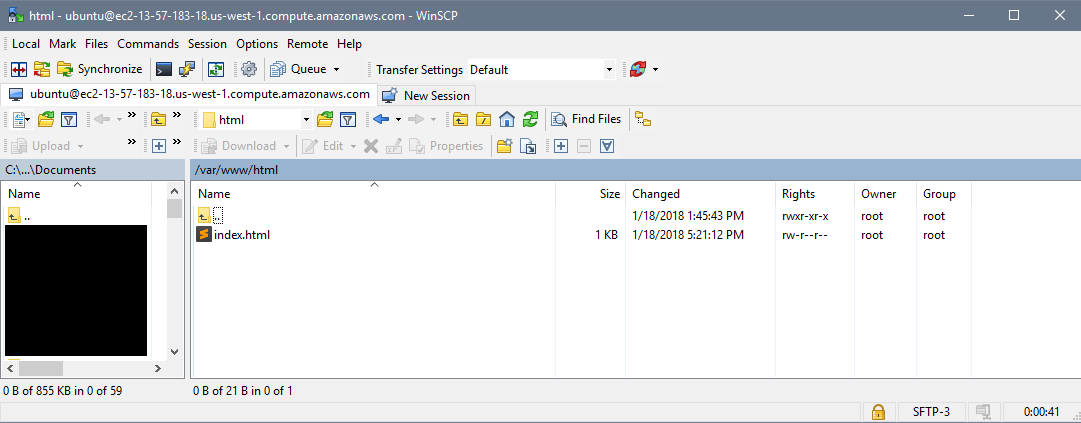
WinSCP HTML Directory
However, you cannot transfer files from your desktop to your server in this directory yet due to the current user permissions for the user ubuntu.
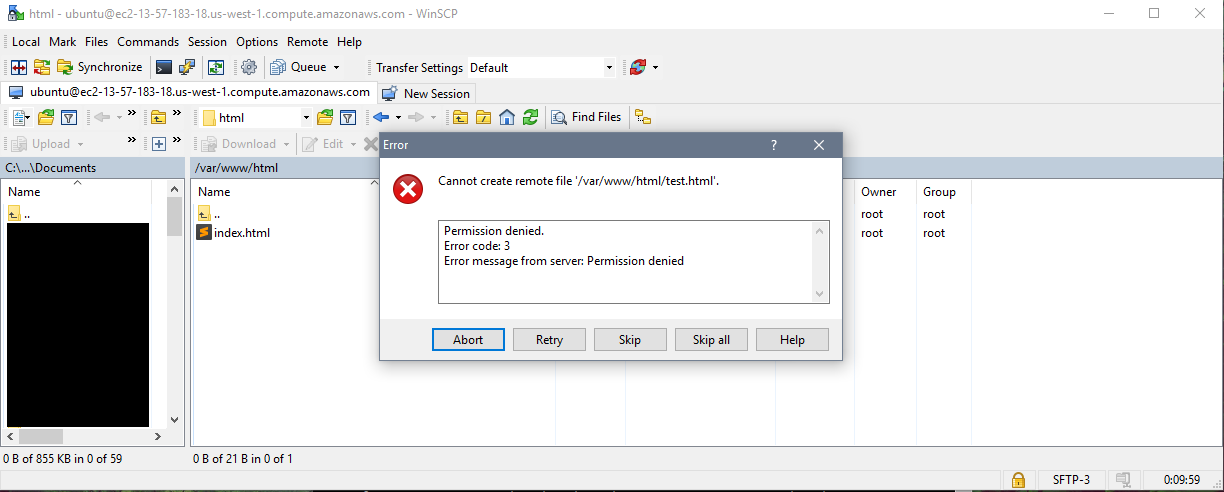
WinSCP Error
To illustrate permissions, we will look at our ubuntu user folder. We can see that the Owner and Group for the ubuntu user folder is ubuntu therefore I was able to add the test.html file with no problems. The Rights column states what kind of permissions certain users have for that directory or file. The permissions are ordered OWNER-GROUP-OTHERS with three possible letters each. So here the OWNER:ubuntu has rwx permissions which are read, write, and execute. The GROUP:ubuntu has r-x permissions which are read and execute only. The OTHERS also have r-x permissions which are read and execute only.
- For Files:
- Read allows you to look into the file.
- Write allows you to edit the file.
- Execute allows you to run the file.
- For Directories:
- Read allows you to see the files within the directory.
- Write allows you to create, edit, and delete files within the directory and delete the directory.
- Execute allows you to enter the directory using the change directory command (cd \DIRECTORYNAME).

Ubuntu User Folder
You can also see the owner, group, and permissions (along with other metadata) of files, links, and directories with the terminal by typing the commands below. In the screenshot below, I am in the same /home directory as in the WinSCP screenshot above. The first command lists the files, links, and directories. The second command lists the files, links, and directories in the long format with more metadata shown. The third command lists the files, links, and directories in the long format with human readable file sizes. The left most column contains the permissions with the first character signify if it's a file, link, or directory represented by a -, l, or d respectively. The second column is the link count, the third column is the owner, the fourth column is the group, the fifth column is the file size, the sixth column is the date of last modification, and the last column is the name of the file, link, or directory.
ls
					    ls -l
						ls -l -h
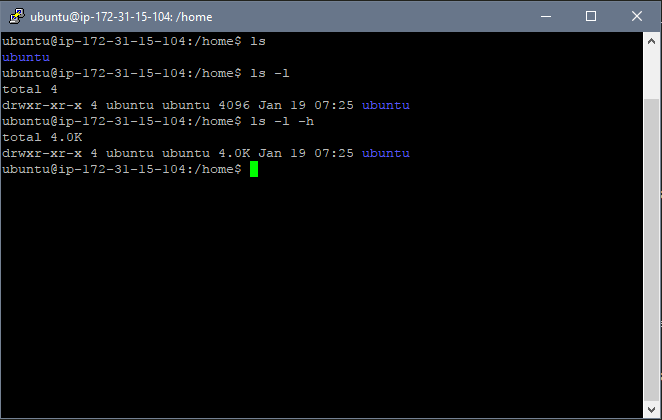
ls Command in /home
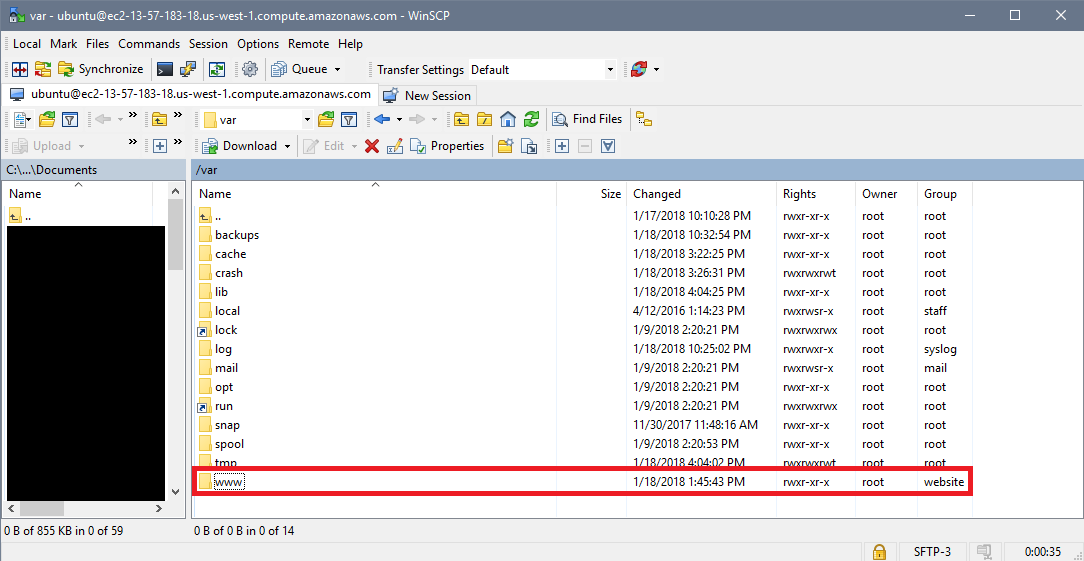
Now if we look at the /var/www/ directory and anything in that directory we can see that both the owner and the group is root. So ubuntu is not the owner of these directories so there goes the read, write, and execute permissions. However, even if the ubuntu user was part of the root group, the group permissions do not include write which is what we need to add files to these directories.
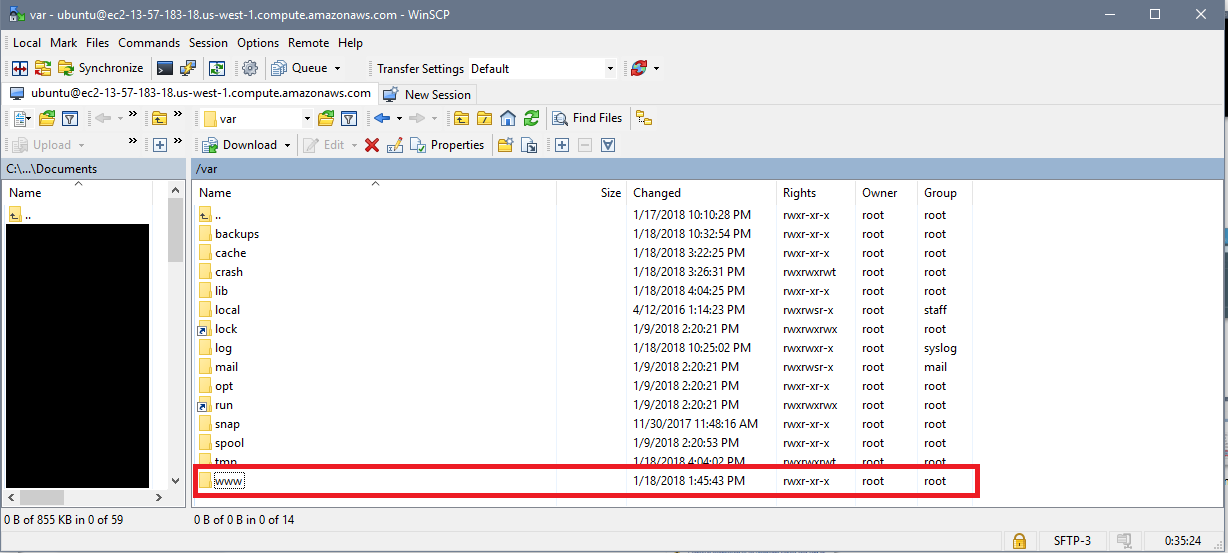
WWW Directory

HTML Directory

Index HTML File
We will now create a group called website and add the ubuntu user to it. Then we will change the /var/www/ directory group to website and give that group read, write, and execute permissions. First we must create the group website by using the command below.
sudo addgroup website
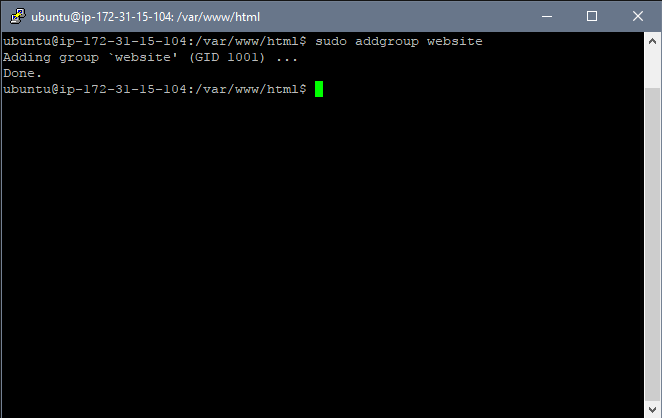
Add Group
Now we must add the ubuntu user to the group website. The command below modifies the user (usermod) and appends (-a) the group (-G) website to the user ubuntu's groups.
sudo usermod -a -G website ubuntu
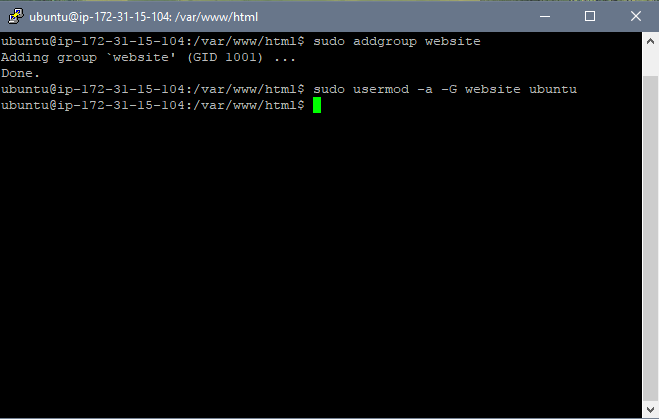
Add User to Group
We can check which groups the user ubuntu belongs to by executing the command below. We can indeed see that the user ubuntu is now part of the group website.
groups ubuntu
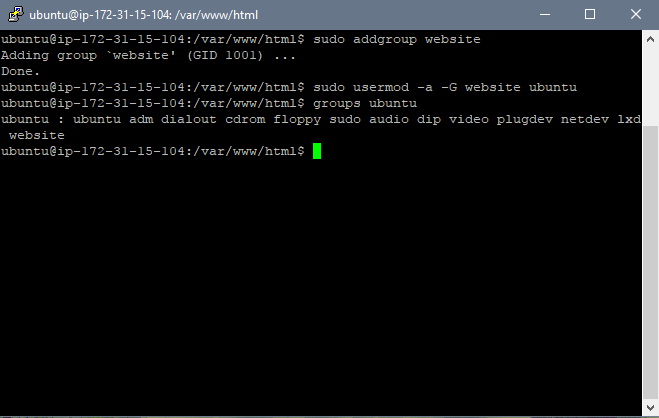
User's Groups
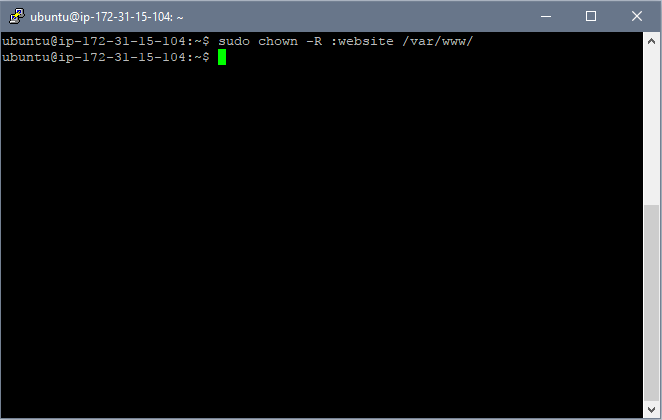
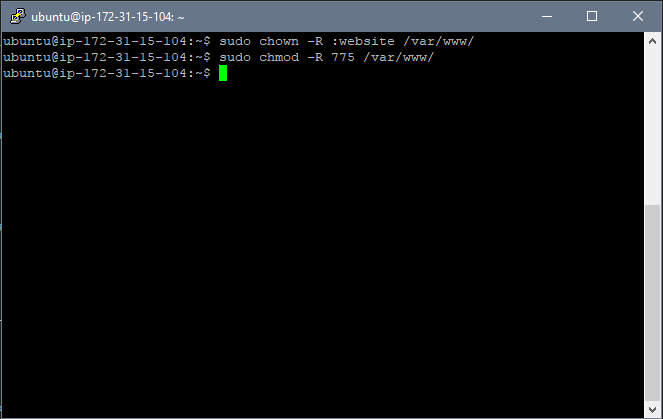
Now we will change the group of the directory /var/www/ and anything in that directory (-R) to the group website with the command change owner (chown). We are changing only the group because we might want other users in the group website to be able to edit the /var/www/ directory.
Note: If you wanted to change the owner of directory only it would be sudo chown -R USERNAME /var/www/. If you wanted to change both user and group it would be sudo chown -R USERNAME:GROUPNAME /var/www/.
sudo chown -R :website /var/www/
Change Owner
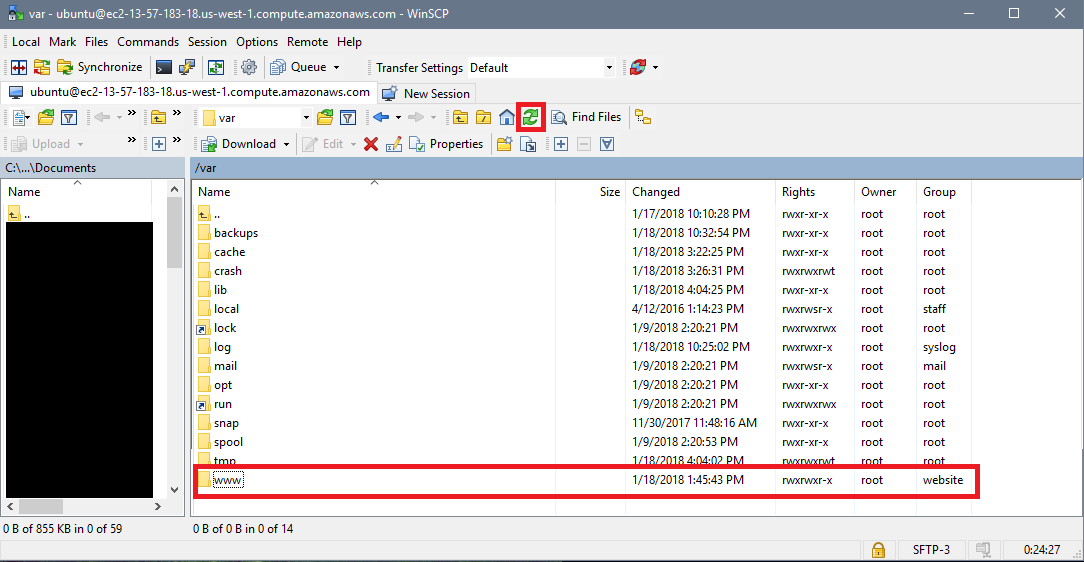
Now we can see that the directory /var/www and anything in it is owned by the group website.
WWW Directory Website Group

HTML Directory Website Group

Index HTML File Website Group
However, we still need to give write permissions to the group website as it currently only has read and execute permissions. We will do this with the command below. The three numbers correlate to OWNER-GROUP-OTHERS. The numbers and their corresponding permissions can be seen below. Here we are giving read, write, and execute permissions to both the OWNER and GROUP while only giving read and execute permissions to OTHERS.
- 7: Read, write, and execute.
- 6: Read and write.
- 5: Read and execute.
- 4: Read.
- 3: Write and execute.
- 2: Write.
- 1: Execute.
- 0: None.
sudo chmod -R 775 /var/www/
Change Permissions
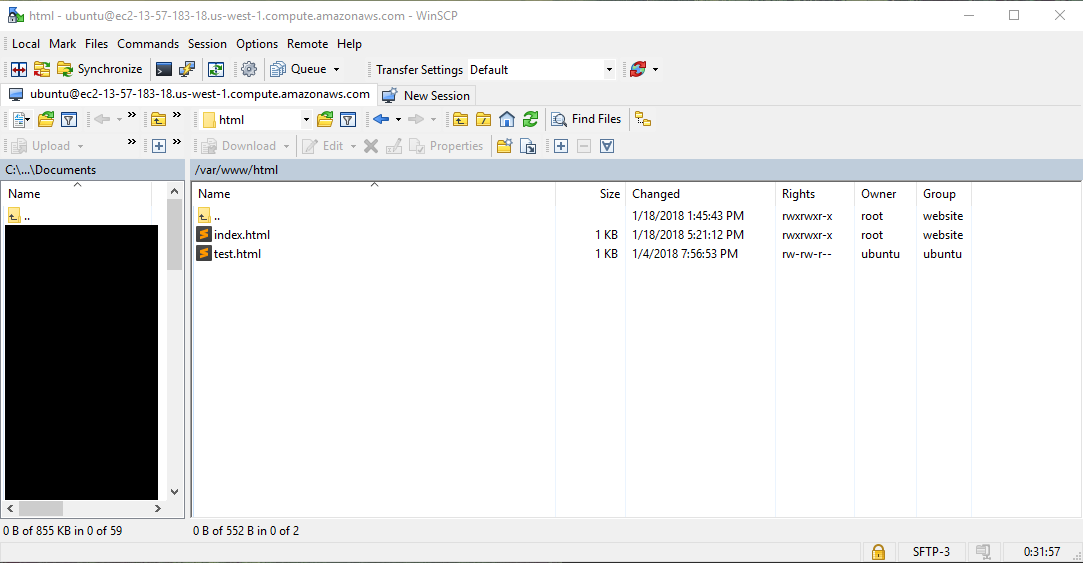
If we refresh the directories, we can see that the directory /var/www and anything in it is owned by the group website and that the group website has read, write, and execute permissions.
WWW Directory Website Group Permissions

HTML Directory Website Group Permissions

Index HTML File Website Group Permissions
Now we can start to add our files to the html folder with our newly granted permissions and start making a website. Please head on over to the HTML and CSS tutorial pages if you would like more information on how to create a website like the one you are currently on.
Upload File
Registering a Domain
You may have noticed that your website URL is rather long and doesn't reflect what your website is about. This website used to only be accessible through that long address containing ec2-##...##.us-west-1.compute.amazonaws.com but I registered a domain and was able to forward jorgemoreno.xyz to my EC2 address.
The first step to having a readable URL is to purchase a domain. I used GoDaddy but there are many other sites that allow you to purchase a domain. Once you have purchased your domain, go to Domain Settings, scroll down to Additional Settings, and select Manage DNS.
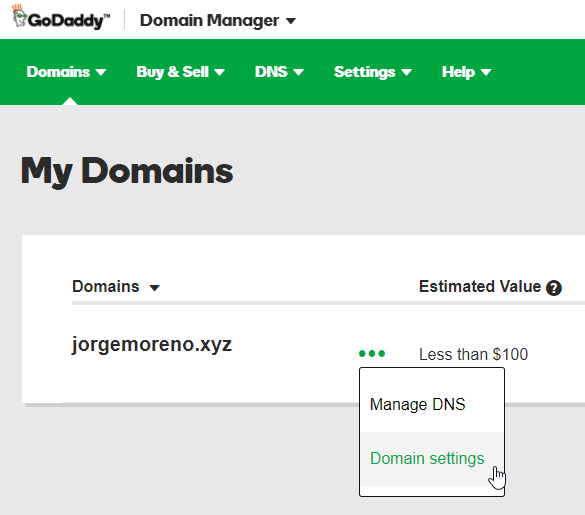
Domain Settings
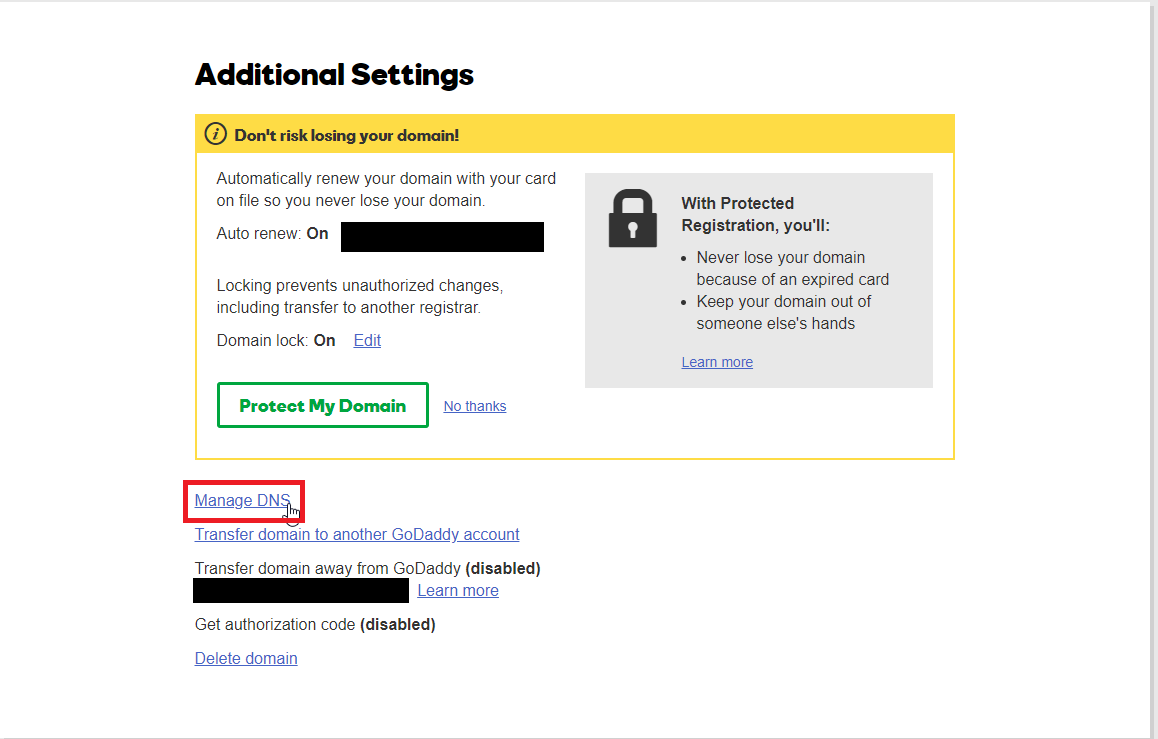
Additional Settings
Scroll down until you see Nameservers and select Custom. Keep this tab open as you will need to paste some values in these fields in a bit.
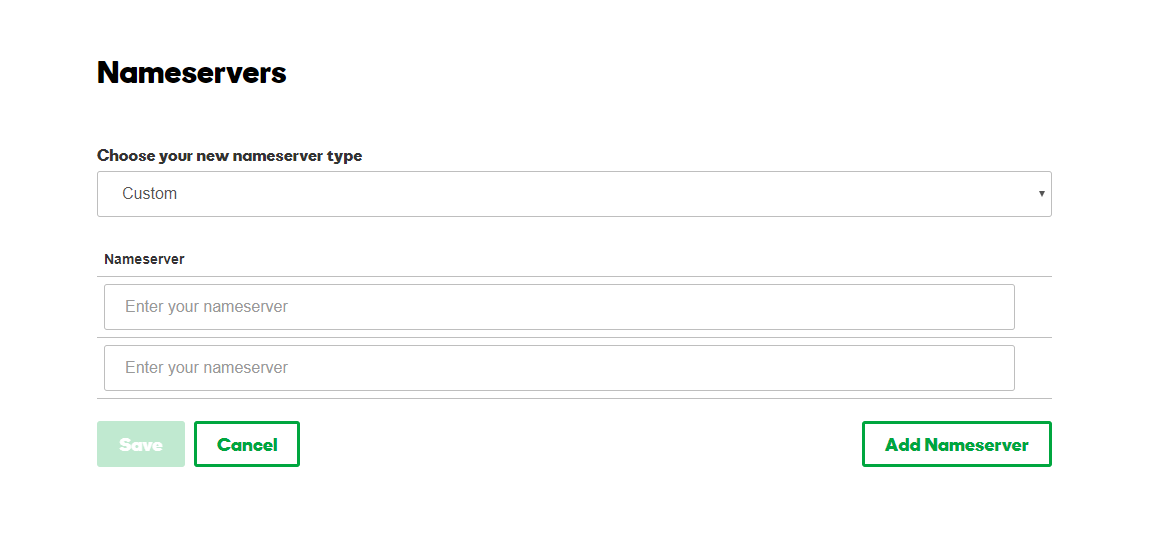
Nameservers
Now go back to the Amazon Web Services website and select Route 53 under Networking & Content Delivery.
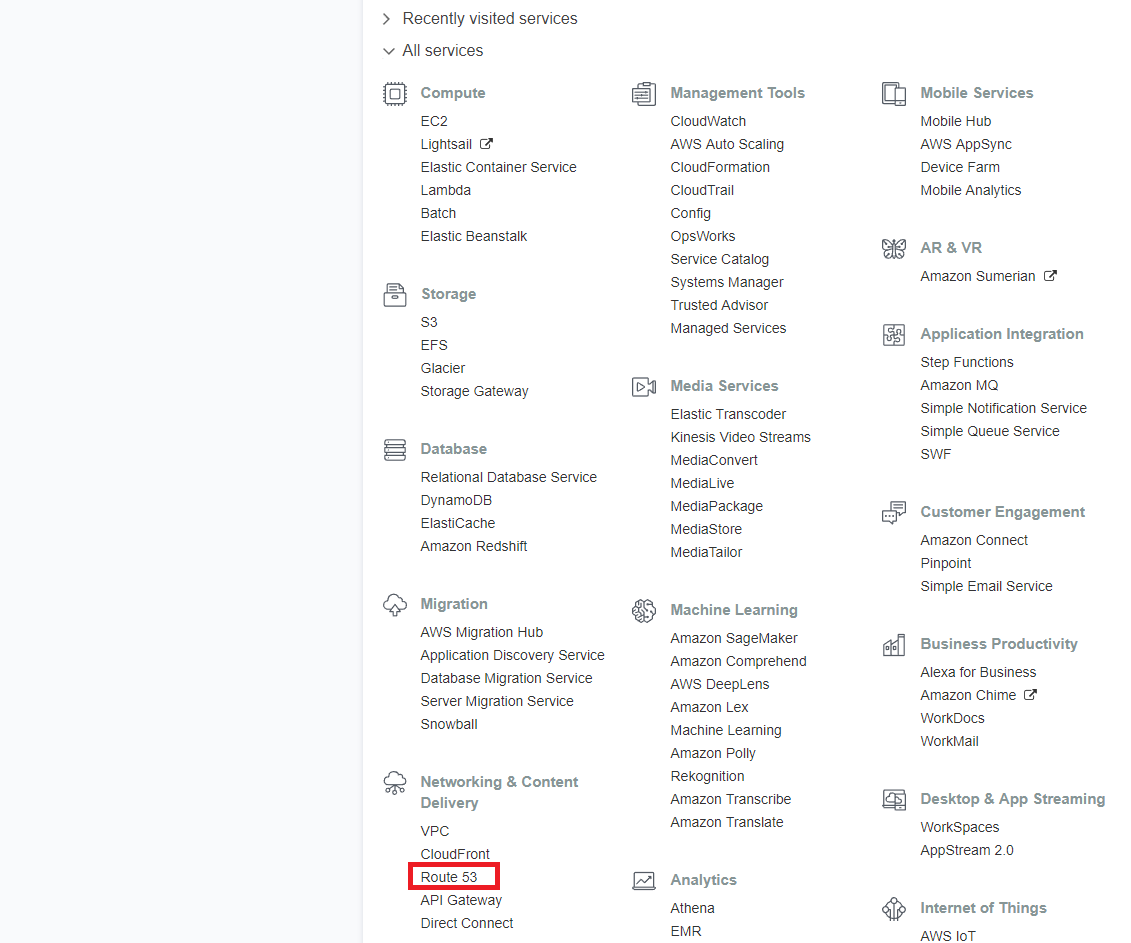
Route 53
Select Get Started Now under DNS management.
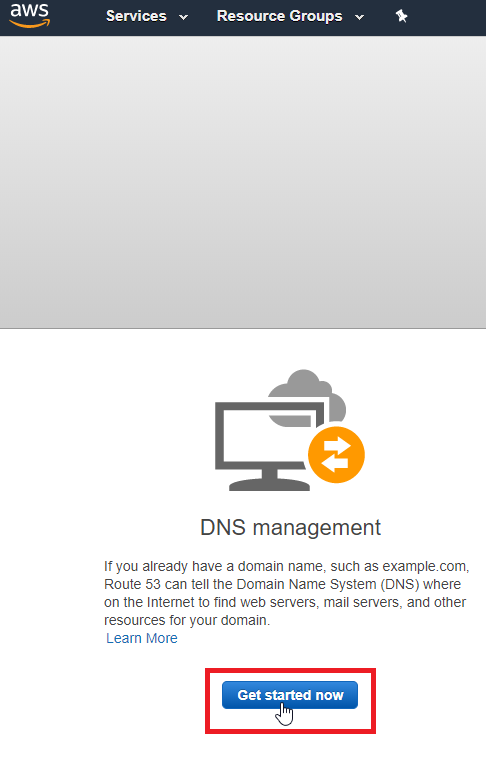
DNS Management
Select Hosted zones on the left hand side and then select Create Record Set. Input your Domain Name on the right hand side and select Create.
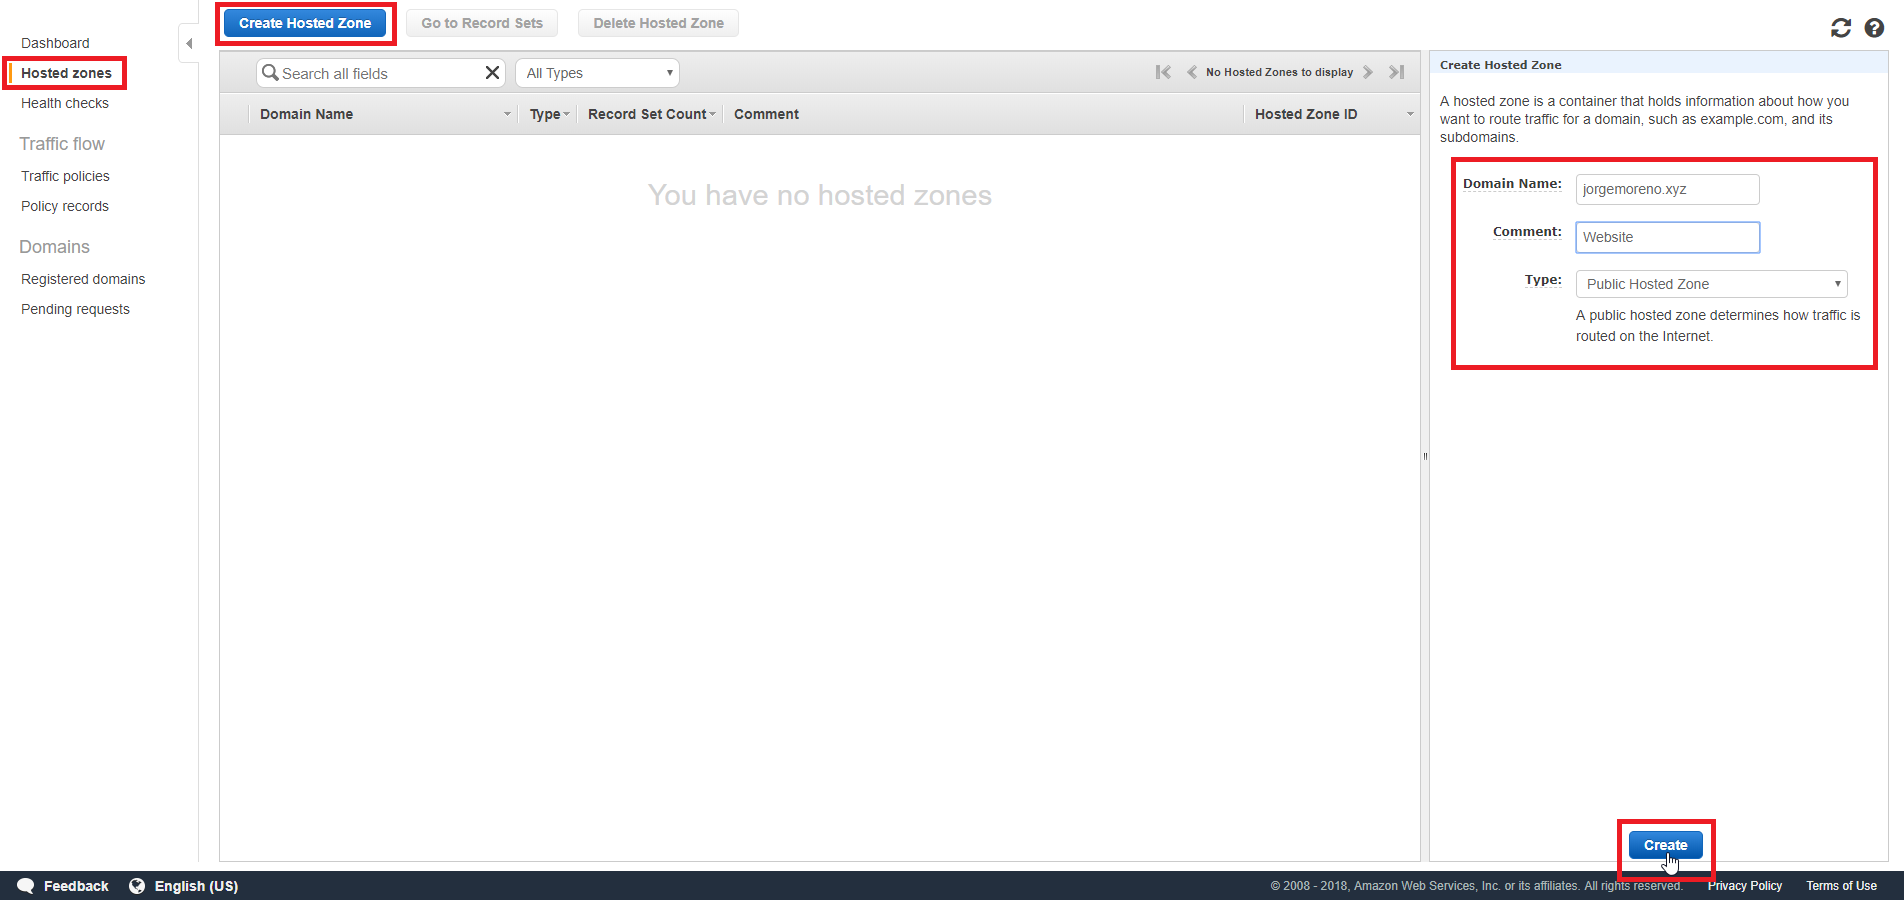
Create Hosted Zone
You should now see your domain with a couple of Nameservers that you can paste into the Nameserver fields on the GoDaddy website from earlier.
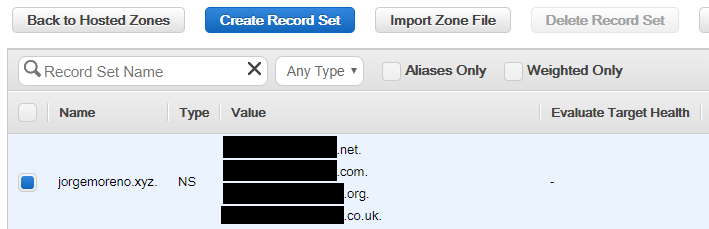
Route 53 Nameservers
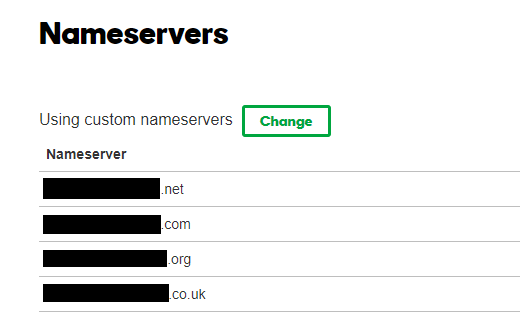
GoDaddy Nameservers
Now back on AWS Route 53, select Create Record Set, enter your IPv4 Public IP in the Value field, and select Create. Your IPv4 Public IP can be found on your Instances Page where you created you EC2 Instance. This will allow your domain name to be forwarded to your EC2 Instance.
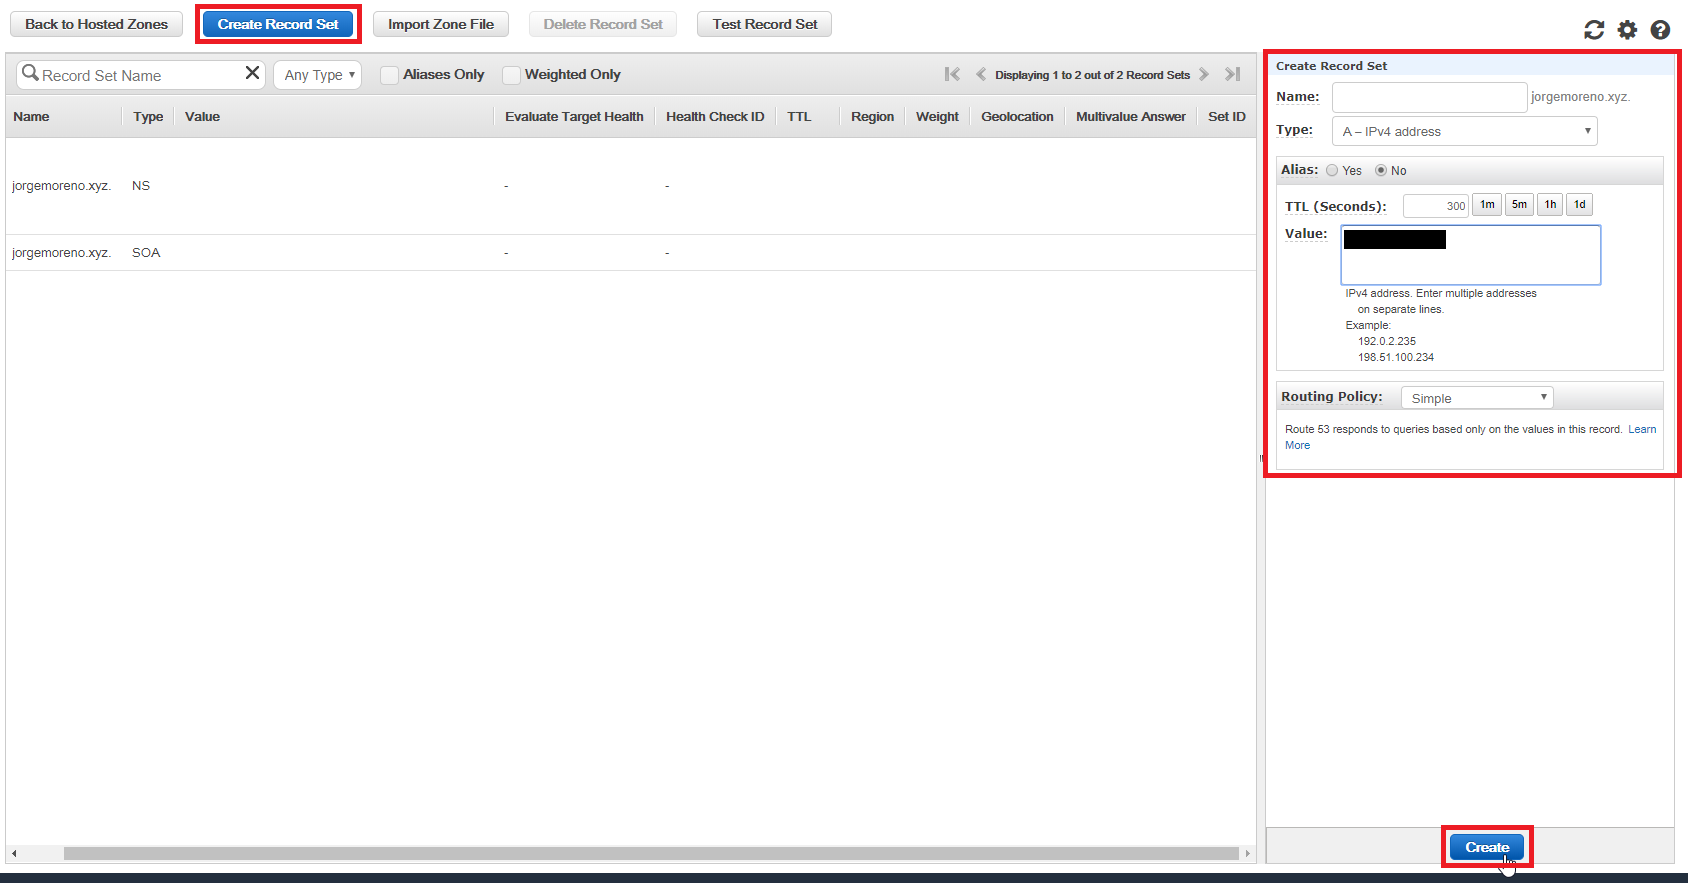
Create Record Set
Create another Record Set and enter www under Name, change Type to CNAME, and enter your domain name in the field Value. This allows for wwww.DOMAINNAME.com to be forwarded to DOMAINNAME.com in case someone put www. in front of the URL.
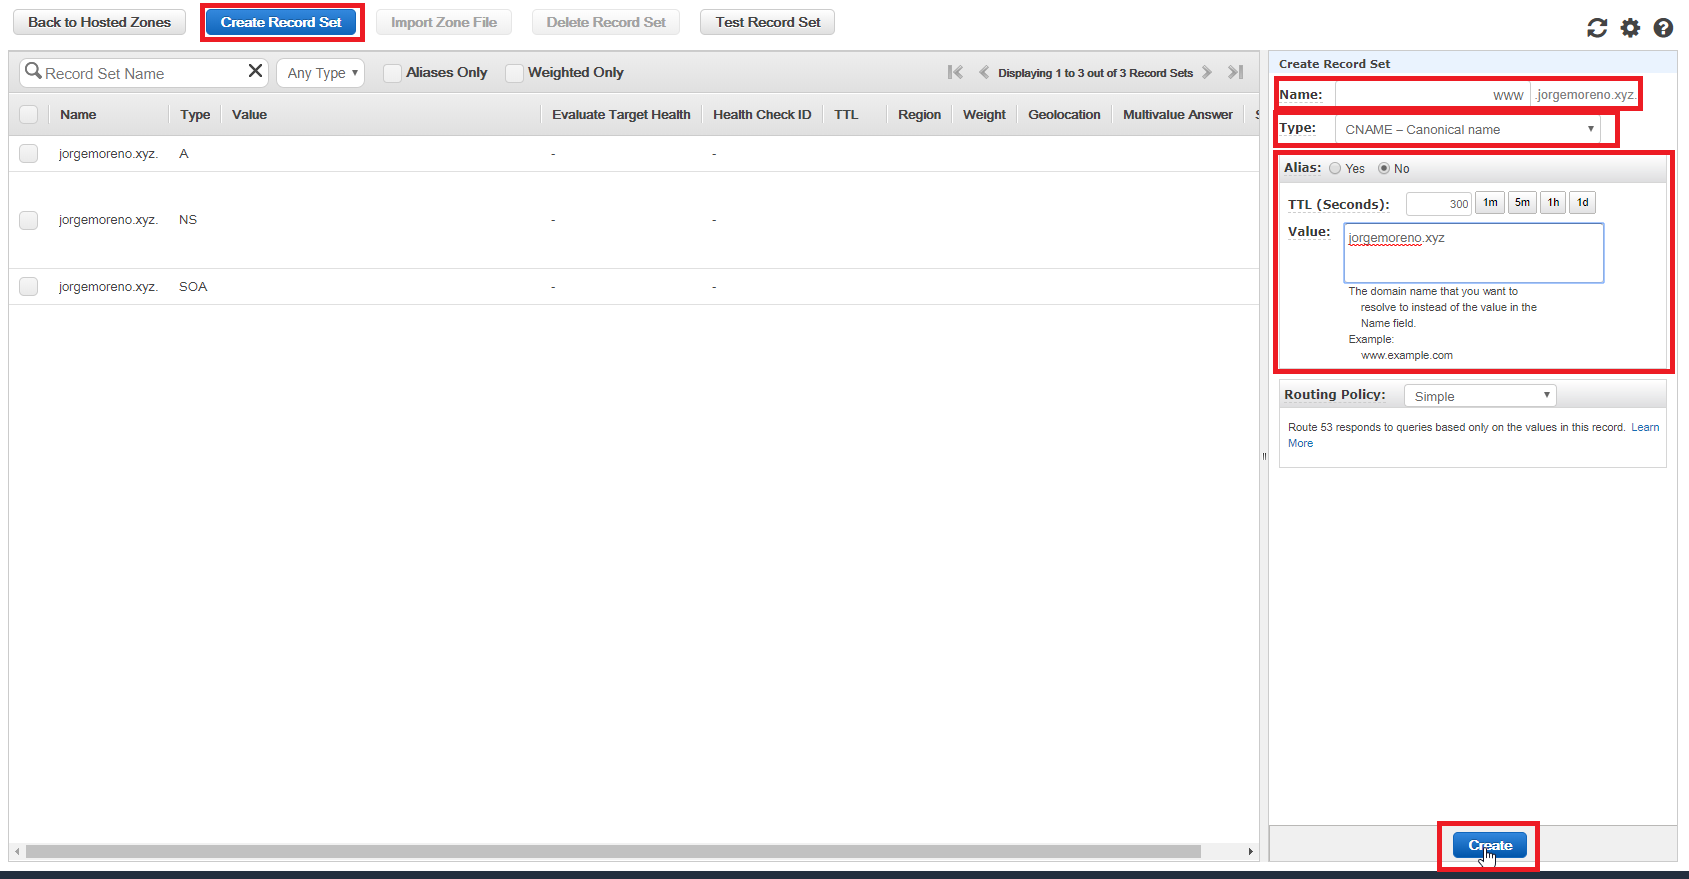
Create Record Set CNAME
You should all be set now. The configuration may take a bit of time to finish so don't be worried if you can't access your website right away.
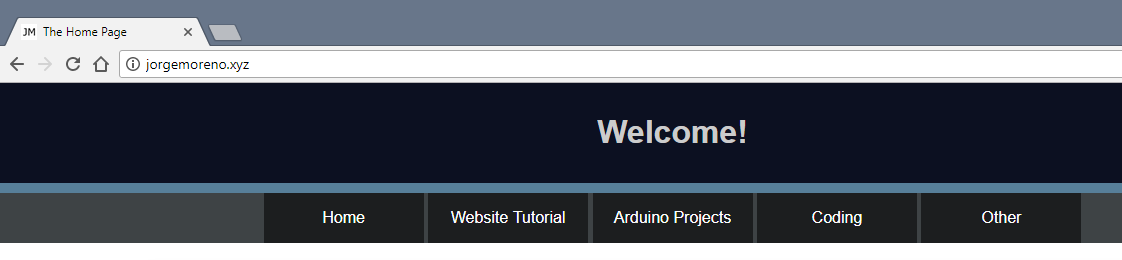
New Domain
Installing Google Analytics
Google Analytics is a very useful tool that can be applied to your website. It allows you to gather data about your website traffic such as how many visits you have gotten, what country the visits are from, what operating system was used, and much more. The first step is to go to the Google Analytics website and sign up.

Google Analytics Sign Up
Fill in your pertinent information and select Get Tracking ID.
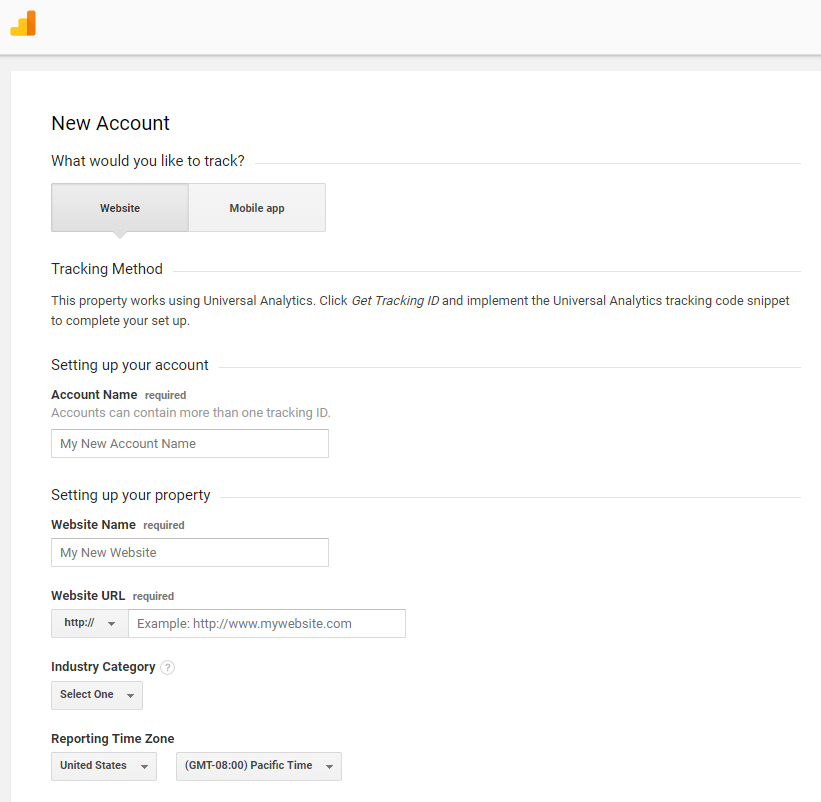
Google Analytics Sign Up Information
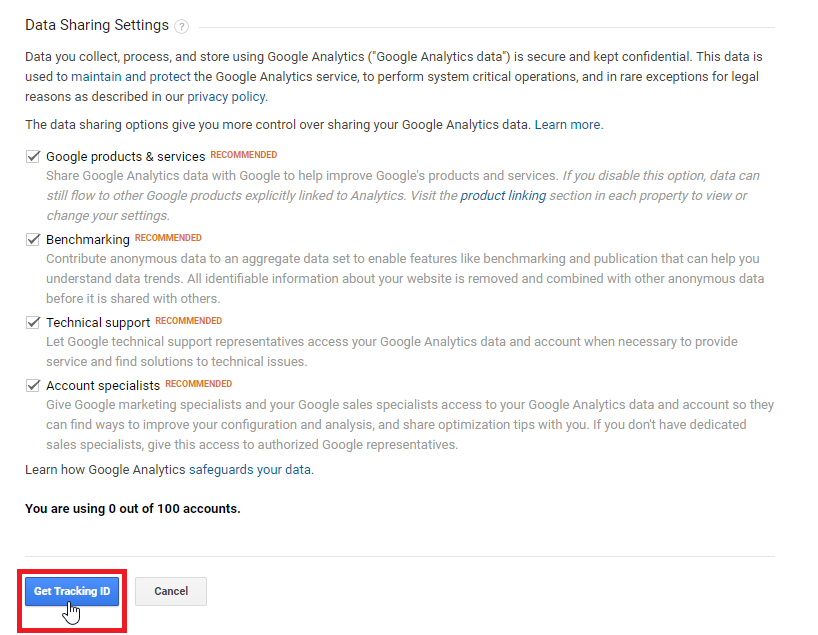
Google Analytics Sign Up Information 2
Copy your Tracking Code and paste it in the head tag <head> of every HTML file that you would like to gather data on. More information about the head tag <head> can be found on the HTML Tutorial page. This is where PHP can come in handy as you can create a head.html file and only paste it once. You would then need to include that head.html file in every PHP file. Please see the PHP Tutorial page for more information.
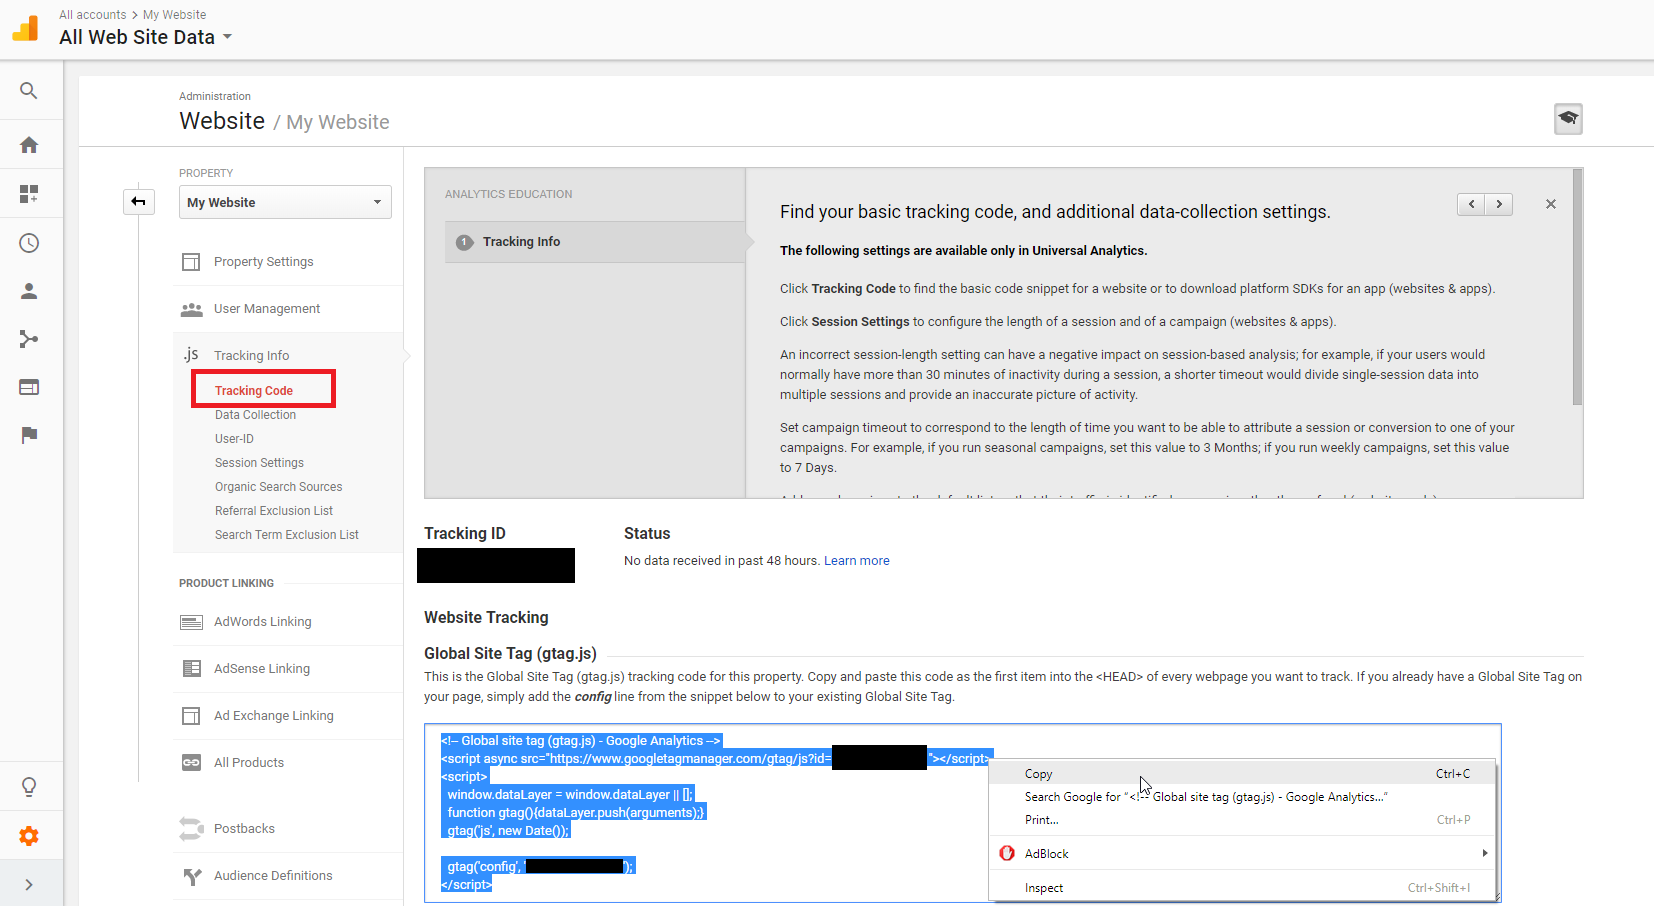
Google Analytics Tracking Code
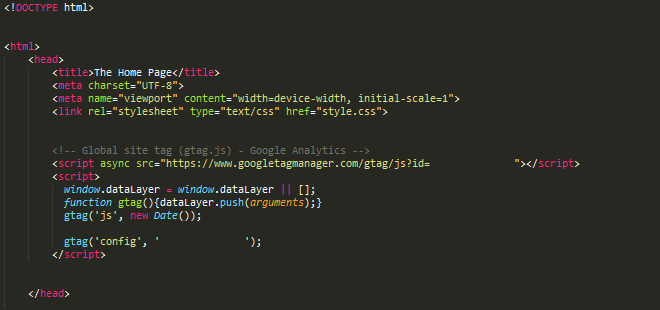
Google Analytics Tracking Code HTML
Now you can see your website data using Google Analytics. It is pretty useful if you want to keep track of your website traffic.
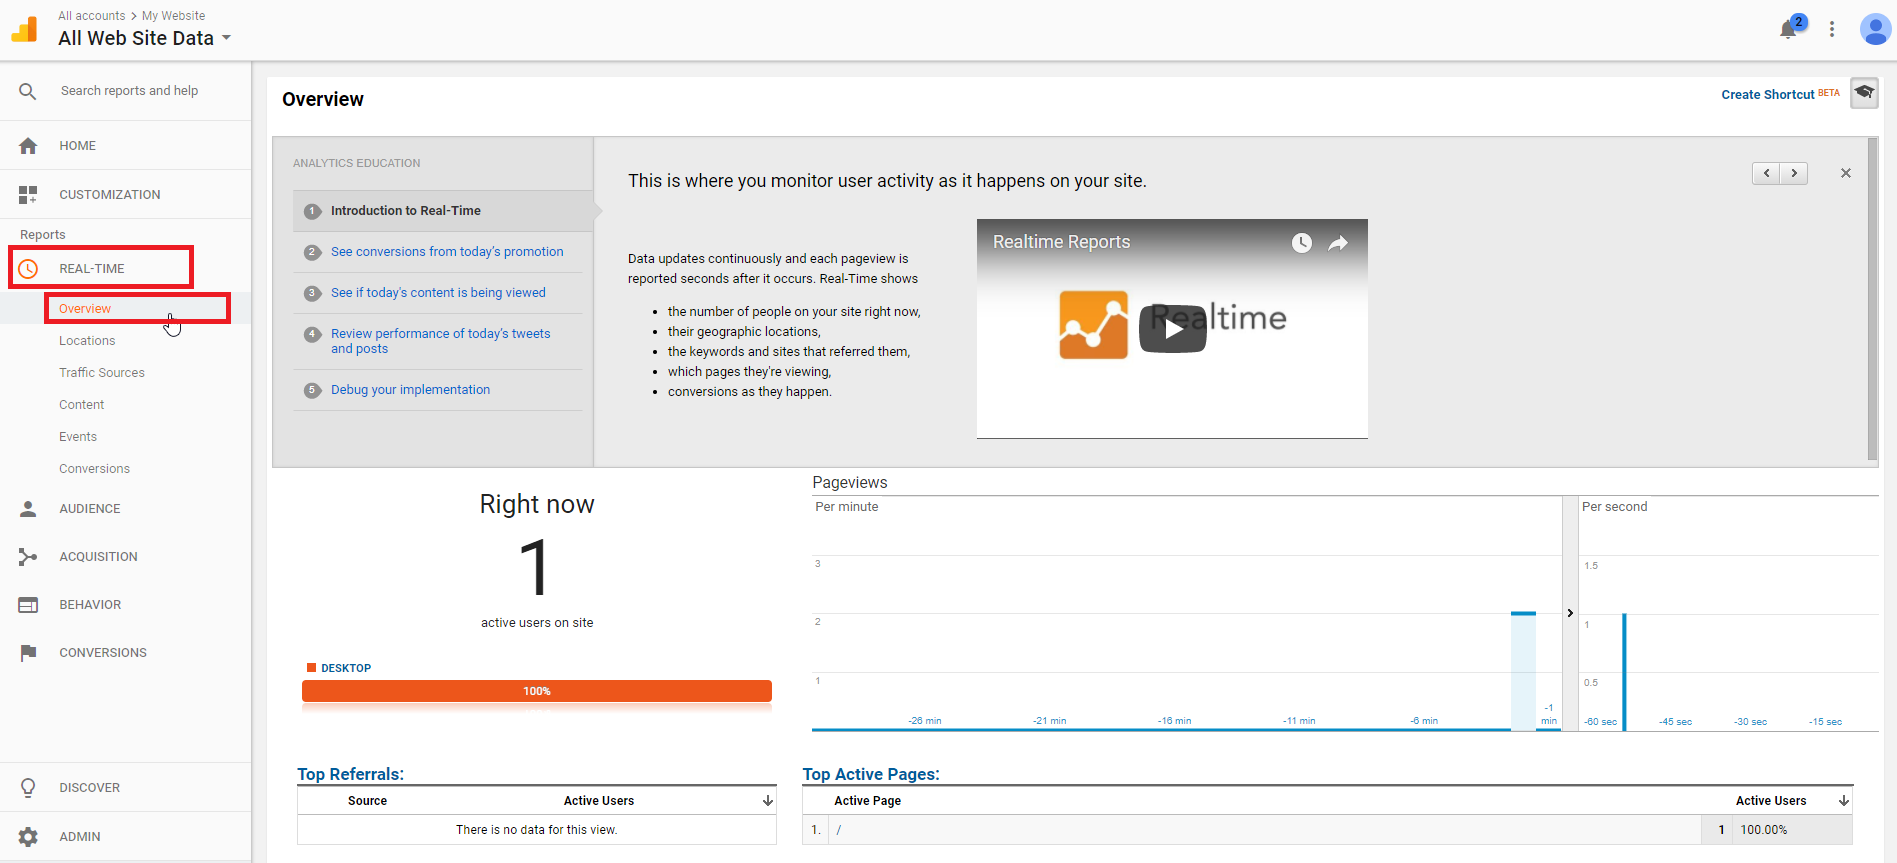
Google Analytics Data